RangeIR Cross Beam Sensor Set
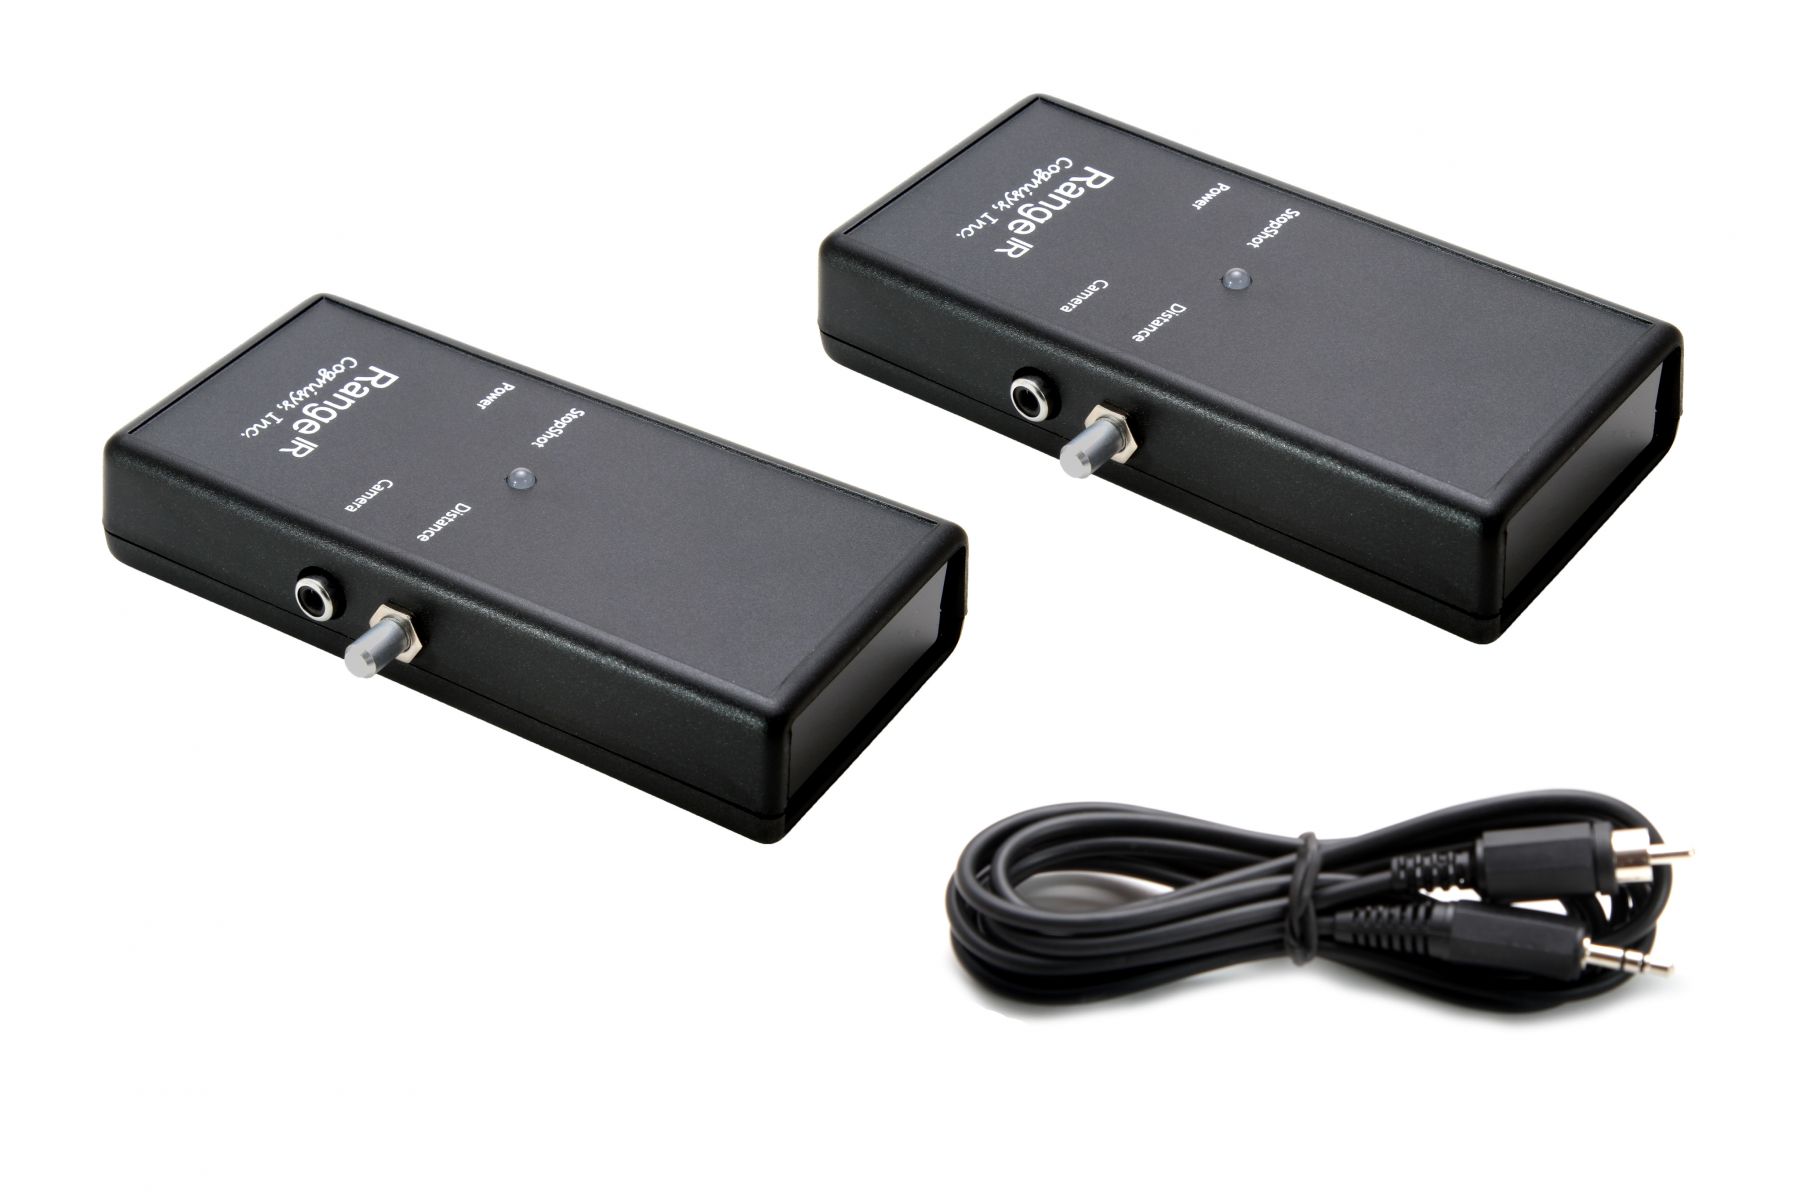
This sensor set includes two RangeIR sensors and the cable required to connect the sensors to StopShot as a cross beam setup.
The RangeIR is a single element sensor designed for capturing wildlife and birds. The transmitter and receiver are both integrated into the same housing, this makes the RangeIR extremely easy to use. Small and lightweight for easy travel. The individual sensor can be used with or without StopShot but for full cross-beam functionality StopShot is required. Use two if you need a cross beam or directional trail sensor. Integrated 1/4-20 tripod mount.
Includes 3.5mm cable and cross beam cable.
The RangeIR is 140mm x 66mm x 28mm
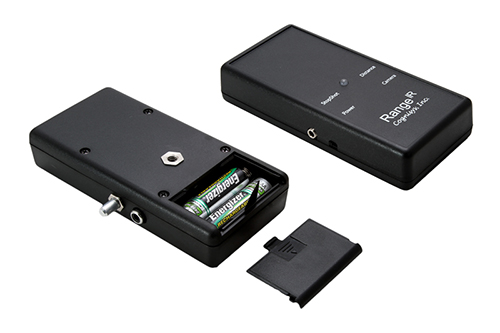
Each sensor requires two AA batteries (not included).
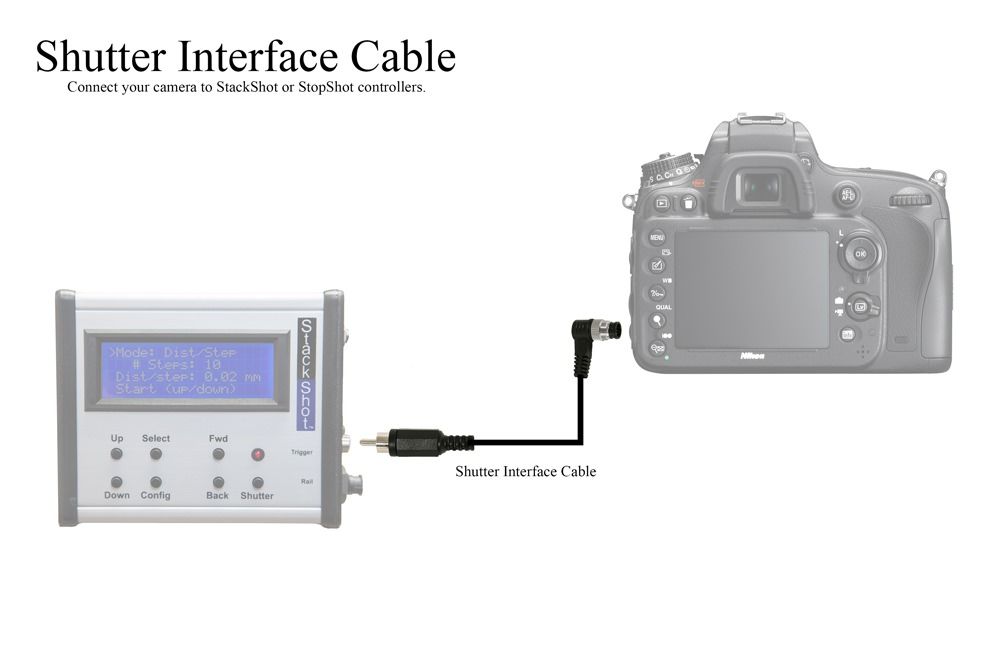
Don't forget the camera interface cable!
The RangeIR
The RangeIR is the perfect backyard sensor for birds and mammals. It is by far the easiest to use sensor we have ever developed. There is no separate transmitter and receiver, this sensor has both integrated into the same package. To use this sensor simply point it where you expect your subject to be and adjust the distance knob so it will not detect anything behind your target area. We like to call it our point and shoot sensor. This is also the first sensor we have that does not require StopShot.
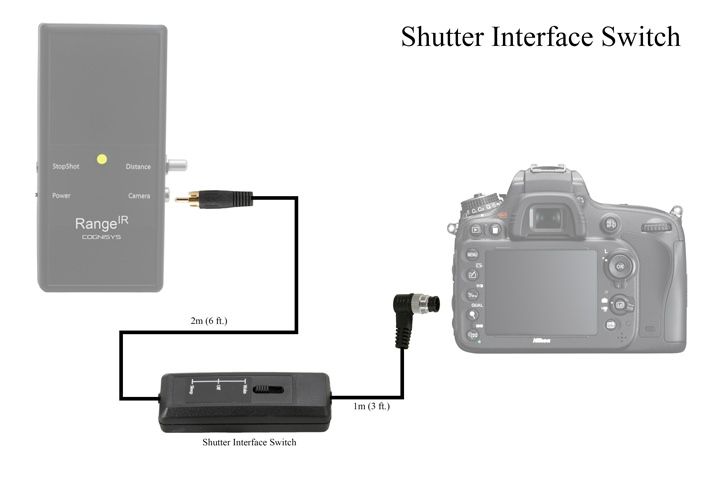
StopShot does make the sensor much more flexible as it gives you the capability to use two of the RangeIR senors in a cross beam configuration, StopShot however is not required to use a single RangeIR. Use the RangeIR with the Shutter Interface Switch for maximum flexibility. The Shutter Switch enables you to keep your camera awake for fast response time or let it go to sleep for longer camera battery life.

Technical Highlights
- RangeIR is powered by 2AA batteries, it works with Alkaline, rechargeable NiMH, or NiCad batteries
- A set of 1900mAHr eneloop NiMH batteries will last for 25 hours of continuous use
- The indicator LED shows both power (green) and a trigger (red)
- Adjustable range from 0.25 m to 10 m
- Will detect small subjects like hummingbirds
- Integrated 1/4-20 Tripod mount on the bottom of sensor.
- Can be used in bright sunlight - range however can be affected by ambient light changes
- Not affected by shadows moving over the sensor
- Compatible with any camera that has a remote shutter port
- Two RangeIR sensors can be used with StopShot as a cross beam sensor or directional trail sensor
- Maximum response time - 16mS
- Extremely portable, sensor measures: 140 mm x 66 mm x 28 mm
Setting up the RangeIR

This image shows a setup used to capture birds at a feeder. In this setup the RangeIR controls the camera and the camera controls the flashes. The RangeIR is connected to the camera using our Shutter Interface Switch The camera is controlling the flash via a set of Pocket Wizards. Both the camera and flashes are set to Manual Mode.
For the setup shot a shutter speed of 1/60 and an aperture setting of f/4 was used. We wanted to expose for the background as well as the bird in this shot. We could get away with these settings without much blur due to the gloomy day when this image was shot. It also happened to be snowing as you can see from the little white dots in the shot.
When you shoot close up shots of birds in flight you will want to use the fastest shutter speed your camera can sync with (the shutter is fully open when the flash is fired), this is usually around 1/250. For the chickadee and goldfinch shots below we used a shutter speed of 1/250 and an aperture setting of f/11 and f/18 respectively. The lens is stopped way down to prevent ambient light from causing blur in the birds. The idea here is to set up your camera so that the image is completely exposed by the flashes. Any exposure by ambient light will cause a ghost of the bird to appear in your image.
Notice the perch on the right side of the image. The perch is provided to give the birds a place to land before they go to the feeder. If the feeder is busy several birds will wait there for an opening. Notice also how the perch is lower than the feeder. This position ensures the birds have to flap their wings in order to get up to the feeder. This makes for much more interesting shots than if they were just jumping and coasting from a perch that was above. It is amazing how predictable the birds wing beats are when they are always flying from the same spot. It is not unusual for the birds to fly from the perch to the feeder and then back to the perch. This allows for two captures each trip. The sensor is capable of capturing birds flying in from long distances away but the path is much less predictable. We found the perch as a great method to "steer" the birds to the right position.
RangeIR Results (click images to enlarge)
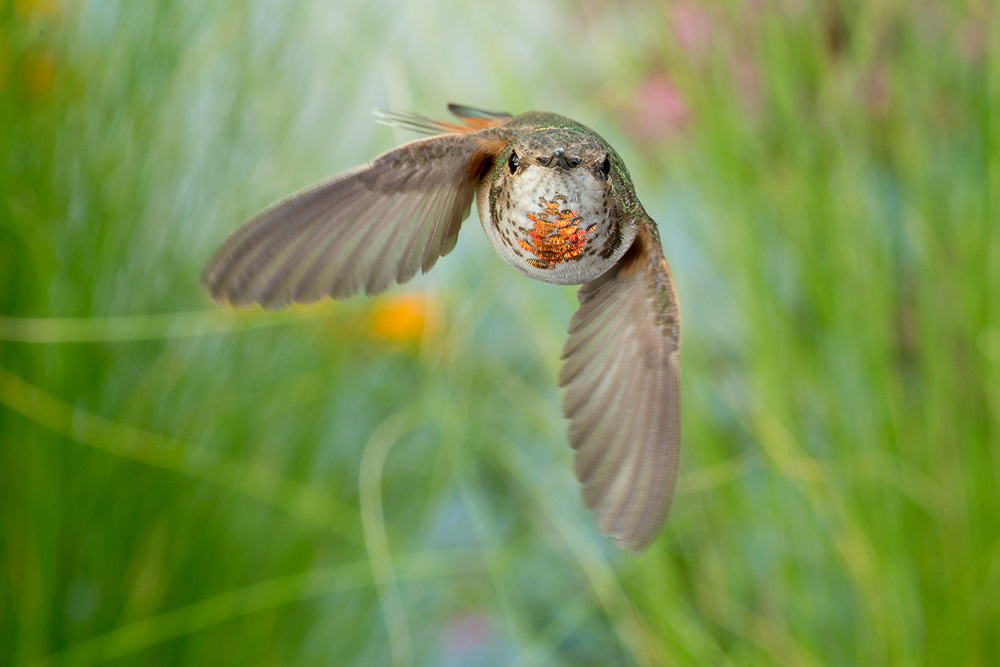
This image of a male juvenile Allens Hummingbird was captured by Roy Dunn in Southern California using a pair of RangeIR sensors and StopShot. Roy uses the sensor connected to StopShot so he can us more than one sensor and be able to delay the next shot until his high speed flashes have fully recharged and are ready for the next capture.
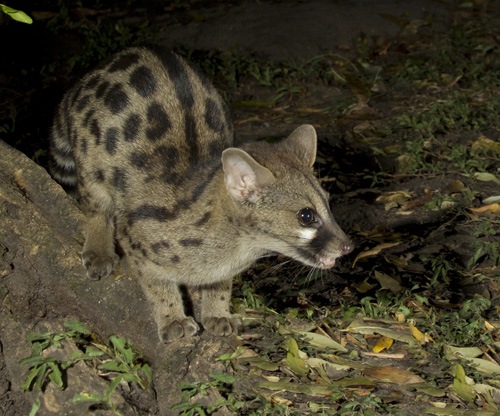
This African Genet was captured by Joe McDonald using the RangeIR sensor on one of his trips to Africa. Joe has a great explanation of how he uses the RangeIR in one of his features: The Story Behind the Photograph. This page has some excellent content and is well worth visiting.

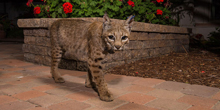
This bobcat was captured with the RangeIR sensor while snooping around Roy's place in Southern California. With our Shutter Interface Switch StopShot can be used to wake up the camera. This increases the shutter lag but saves the battery for critters that don't come by very often.
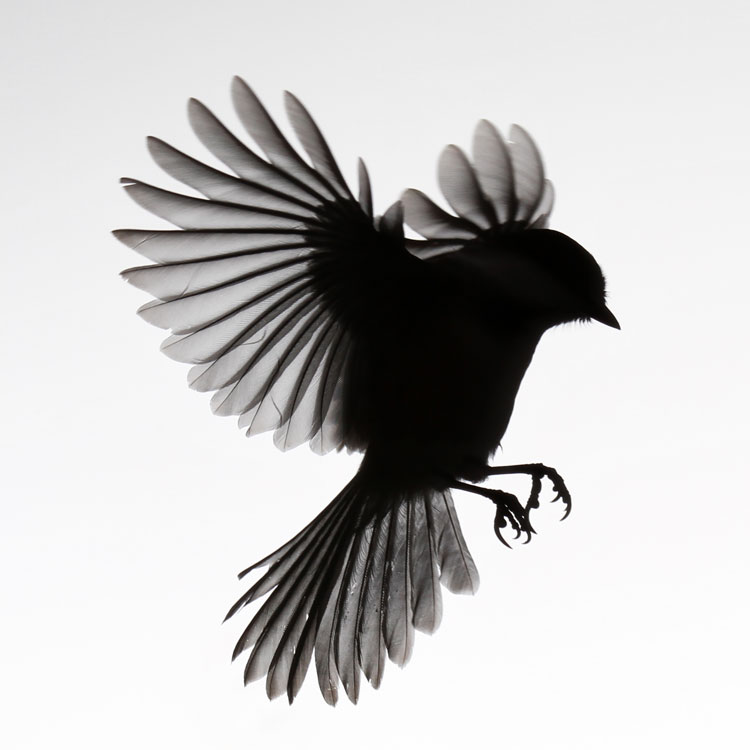
This Black Capped Chickadee was captured with a setup very similar to the one shown above. The big difference was that a white background was added and the flashes were used to illuminate the background instead of the subject. This technique makes for some excellent silhouettes.
Chameleon in Action
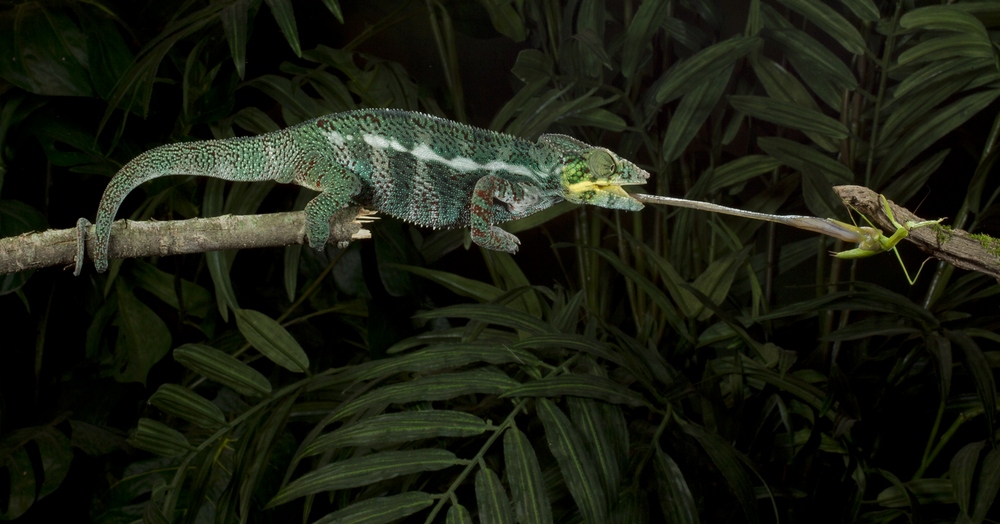
This image of the Chameleon was taken by Joe McDonald and David Northcott at the Hoot Hollow Institute using the RangeIR sensor.

Jumping Bullfrog
This image of the Bullfrog was captured by Steve Gettle using the RangeIR. You can find more details of how this image was captured on Steve's Blog.
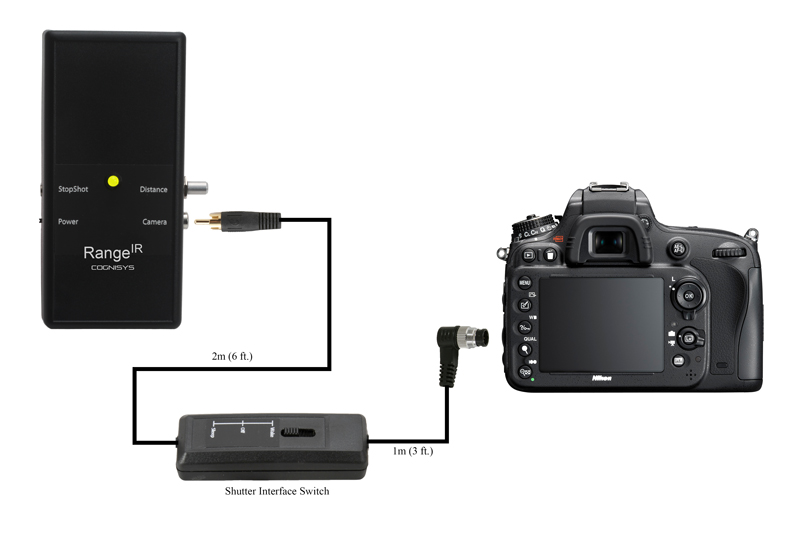
RangeIR Connections
Quick Specs
- Length: 140 mm
- Width: 66 mm
- Height: 28 mm
- Weight: 170 g
- Outputs: 1
- Max Range: 10 m (30 ft)
- Sampling Rate: 17 mS
See a comparison of the RangeIR and Sabre.
Top Customer Questions and Answers (FAQ)
RangeIR Resources
Owner's Manual
Backyard Recon
RangeIR Accessories:
-

Starting at $29.00
-
Starting at $49.00