Photographing Bats with Sabre - Eliminate Shutter Lag
Sabre in the Dark - Eliminate Shutter Lag
Why Control Your Flash With Sabre
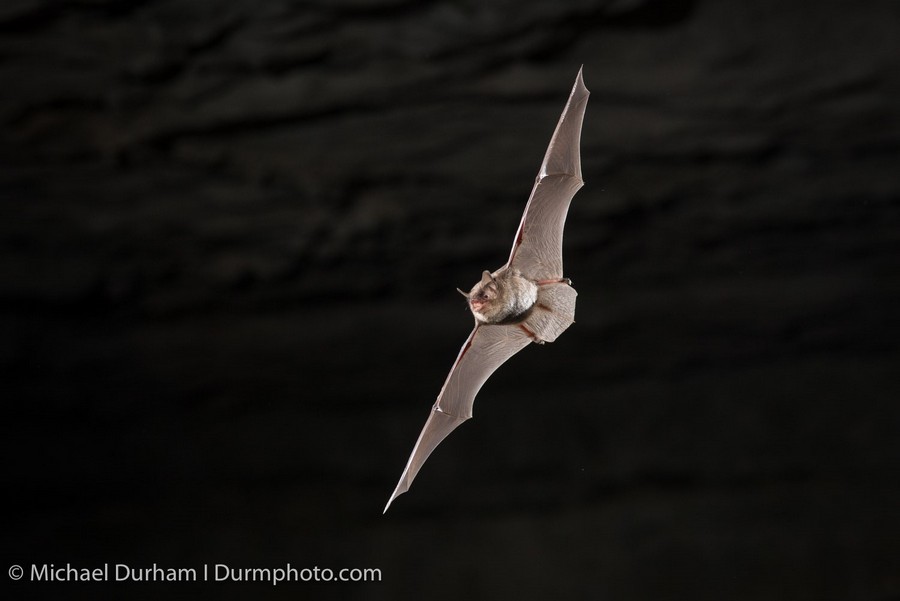
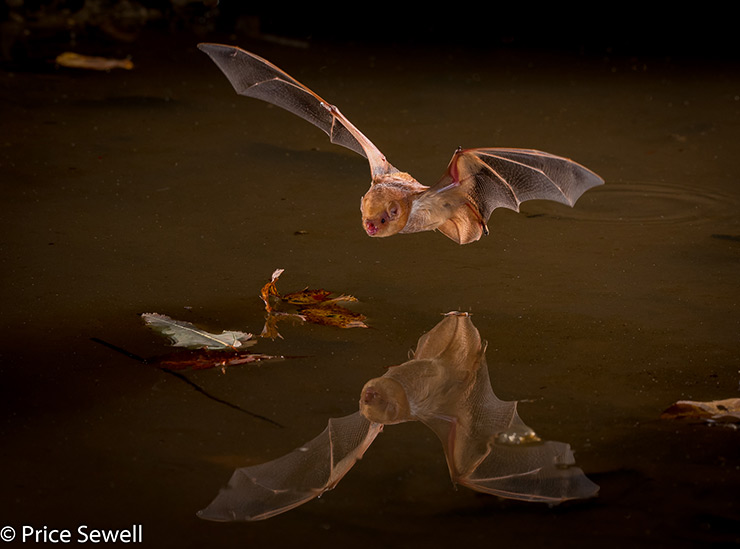
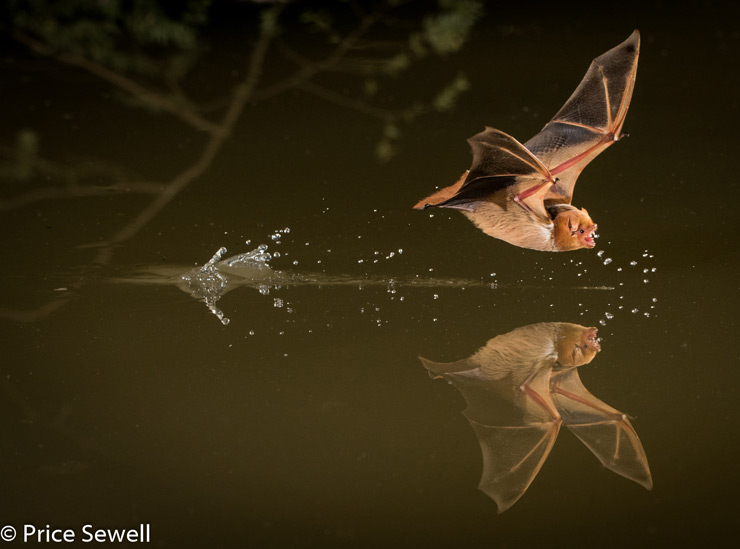
When you are shooting fast moving subjects in the dark you can take advantage of the darkness and use Sabre to fire the flash instead of the camera. The advantage of this method is the elimination of shutter lag - you get the fastest response time possible. The disadvantage is the camera shutter has to be held open so your camera battery life will suffer and you will have some black frames when the camera is not triggered. Sabre can be configured to hold the shutter open and control the flash independently. Then when a subject is detected Sabre will fire the flash and refresh the frame for the next shot. Sabre will also refresh your frame at a programmable interval to prevent noise from accumulating while the shutter is held open. In this web page we will walk you through both the connections needed and the configuration of Sabre. You can see a perfect application for this method shown below.
The image to the left was image was captured by Michael Durham using the Sabre. This bat is a federally endangered Indiana Bat and was captured with cooperation of the U.S. Fish and Wildlife Service. Many thanks to Michael for sharing the image!
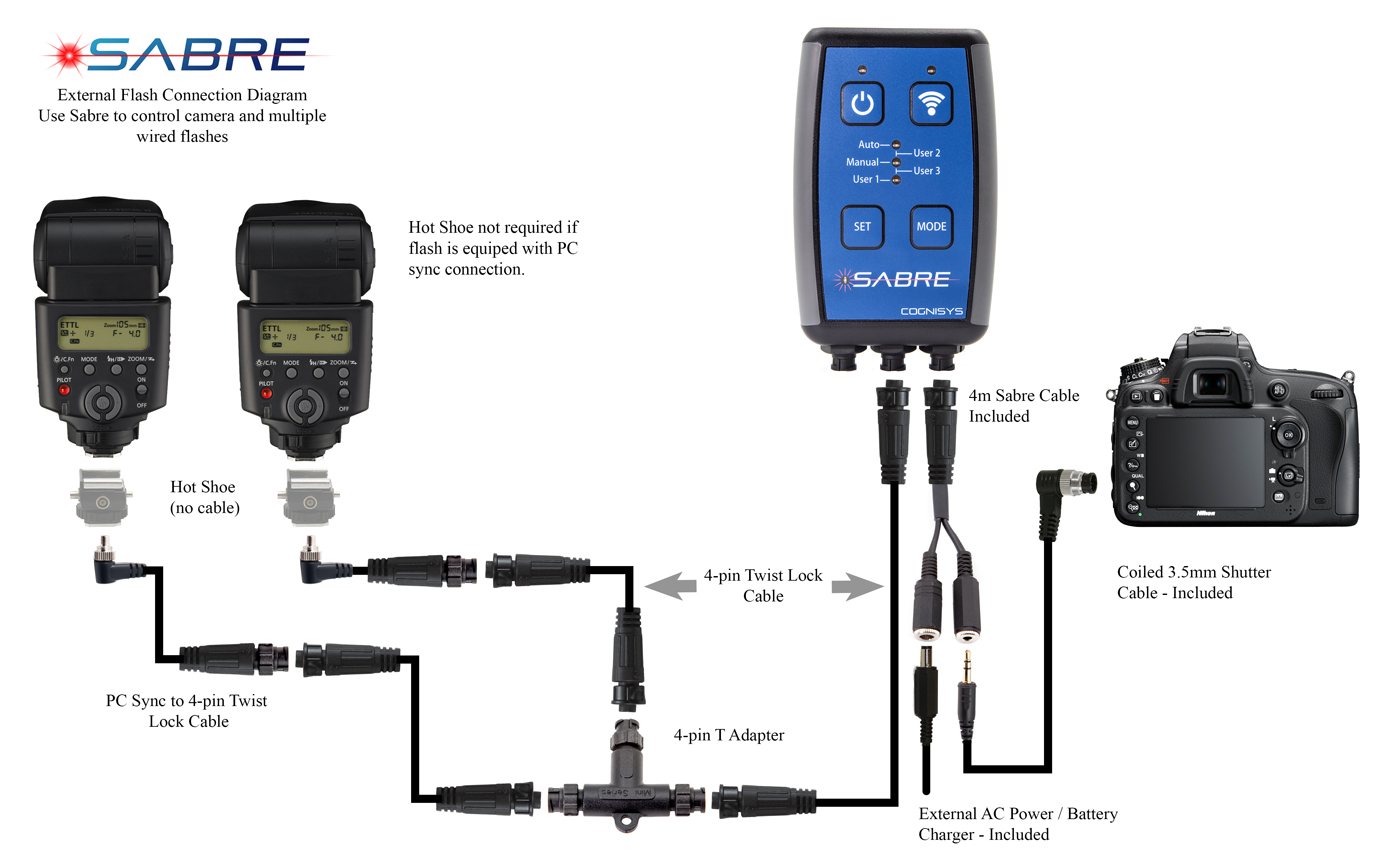
Connecting Sabre to Your Flash and Camera
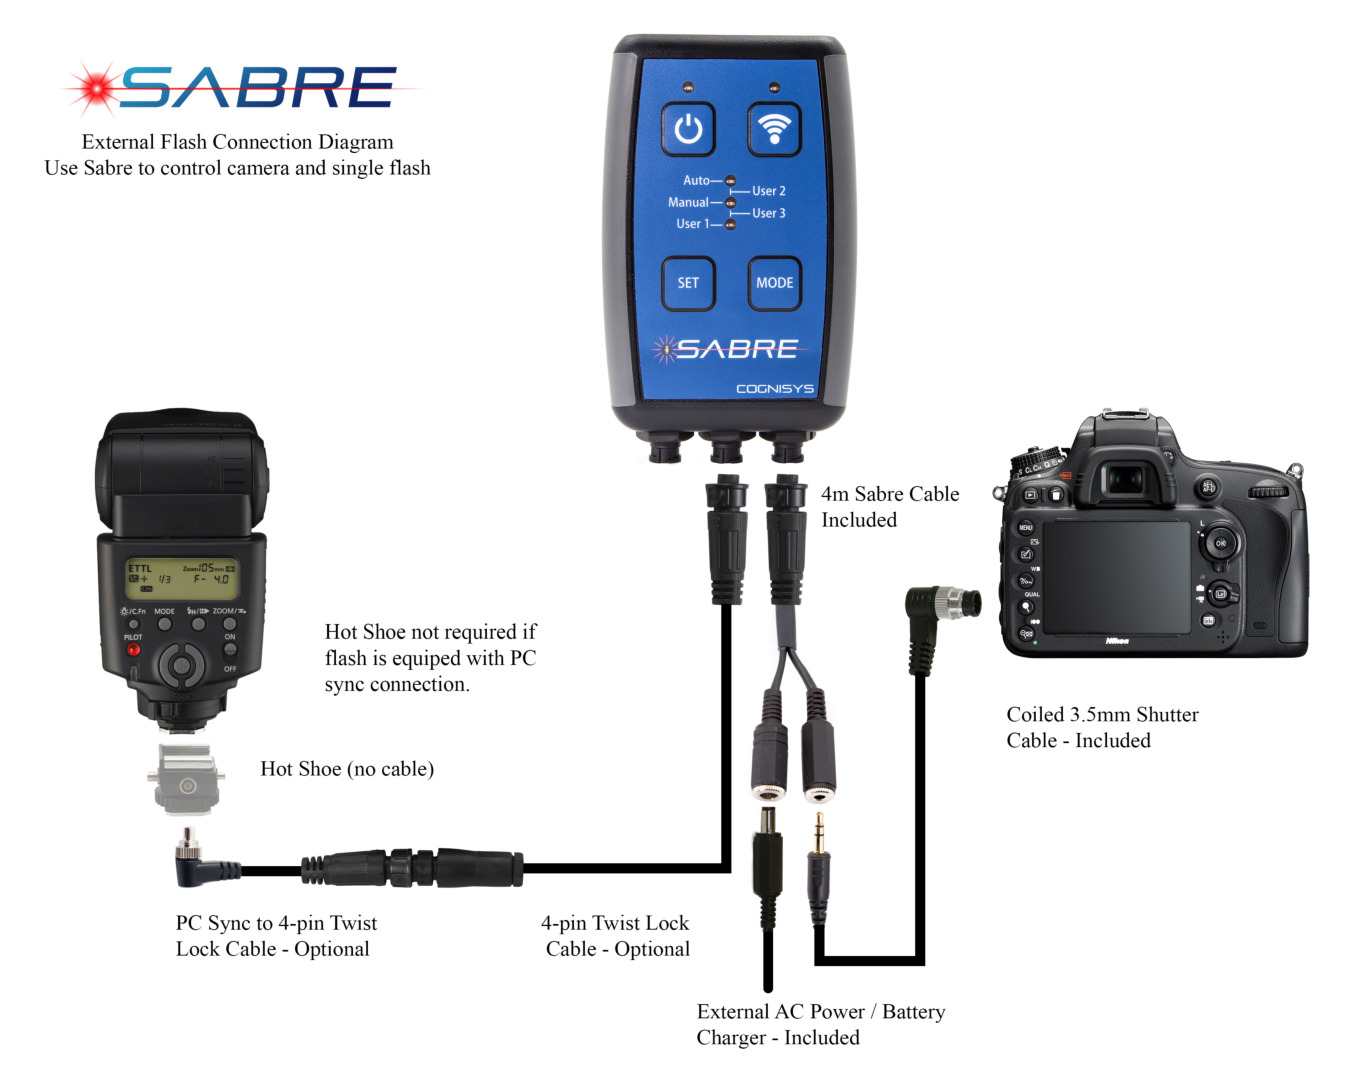
When connecting your camera and flash as shown above - you will want to have your camera in Bulb mode, set the aperture and ISO to properly expose the image with the flash power you are using. The flash should be in manual mode - also if you are trying to stop fast action you will want to keep the flash power as low as possible and use multiple flashes to get the light you need. Hover over and click any of the cables above to find that cable in our store.
Sabre Settings - Bat Mode
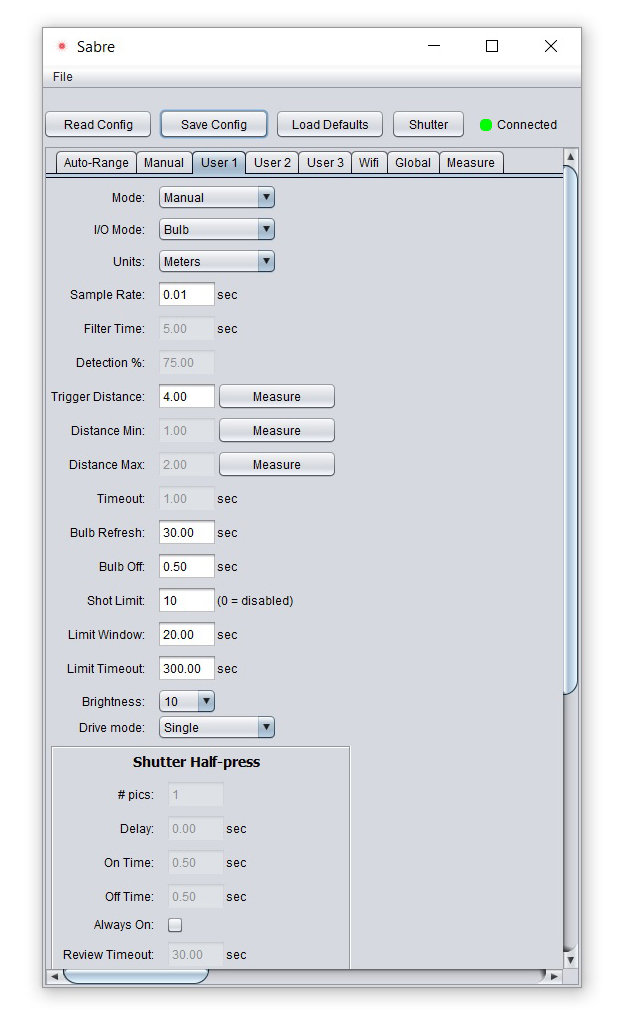
Configuring Sabre to trigger the camera and external flash can be done by first changing to the tab you want save your configuration to, in this case I used USER 1. Next change the I/O to Bulb. You may also want to change the triggering distance depending on your setup - in this case I changed the distance to 4.0 m. That's it you are ready to go. Press the Save Config button to save your settings off to Sabre and you are done. All of the other parameters were left at the default value. You will notice that the Shutter settings are grayed out and not available to change - this is because all of the shutter timing is fixed in Bulb mode - your camera shutter is held open until a trigger is received. At that point the flash will fire and the Sabre will refresh the frame on the camera.
Other parameters you may want to change when shooting in this mode:
Sample Rate
Sample Rate is how often the sensor actually takes a reading - the fastest the sensor can sample is once every 10 mS (the default). You probably want to leave this at the fastest rate if shooting bats but if you are capturing mammals you can increase this value to save battery life. In the case of mammals once every 0.5 seconds is a good place to start.
Bulb Refresh
Bulb Refresh is the amount of time the Sabre will hold the camera shutter open before refreshing the frame, the default value is 30 seconds. This is pretty conservative and for most modern DSLR cameras it can be increased to 60 seconds or even longer without seeing significant noise - you will want to set this value with your ISO setting in mind. The higher your ISO the shorter this delay should be.
Shot Limit
Shot Limit, Limit Window and Limit Time out all work together to prevent your memory card from filling up due to unforeseen changes in the environment. In this case if Sabre fires 10 times (Shot Limit) in 20 seconds (Limit Window) it will wait 300 seconds (Limit Timeout) before it will fire the camera again. This feature will minimize the number of shutter cycles on the camera and memory being used if heavy snow or rain starts or if some vegetation starts to blow in front of your trigger area. If you do plan to leave your Sabre unattended for long periods of time we do recommend you set your sensor for Manual mode. This will also help minimize false triggers.
Connecting Sabre to Wireless Flash Transmitters
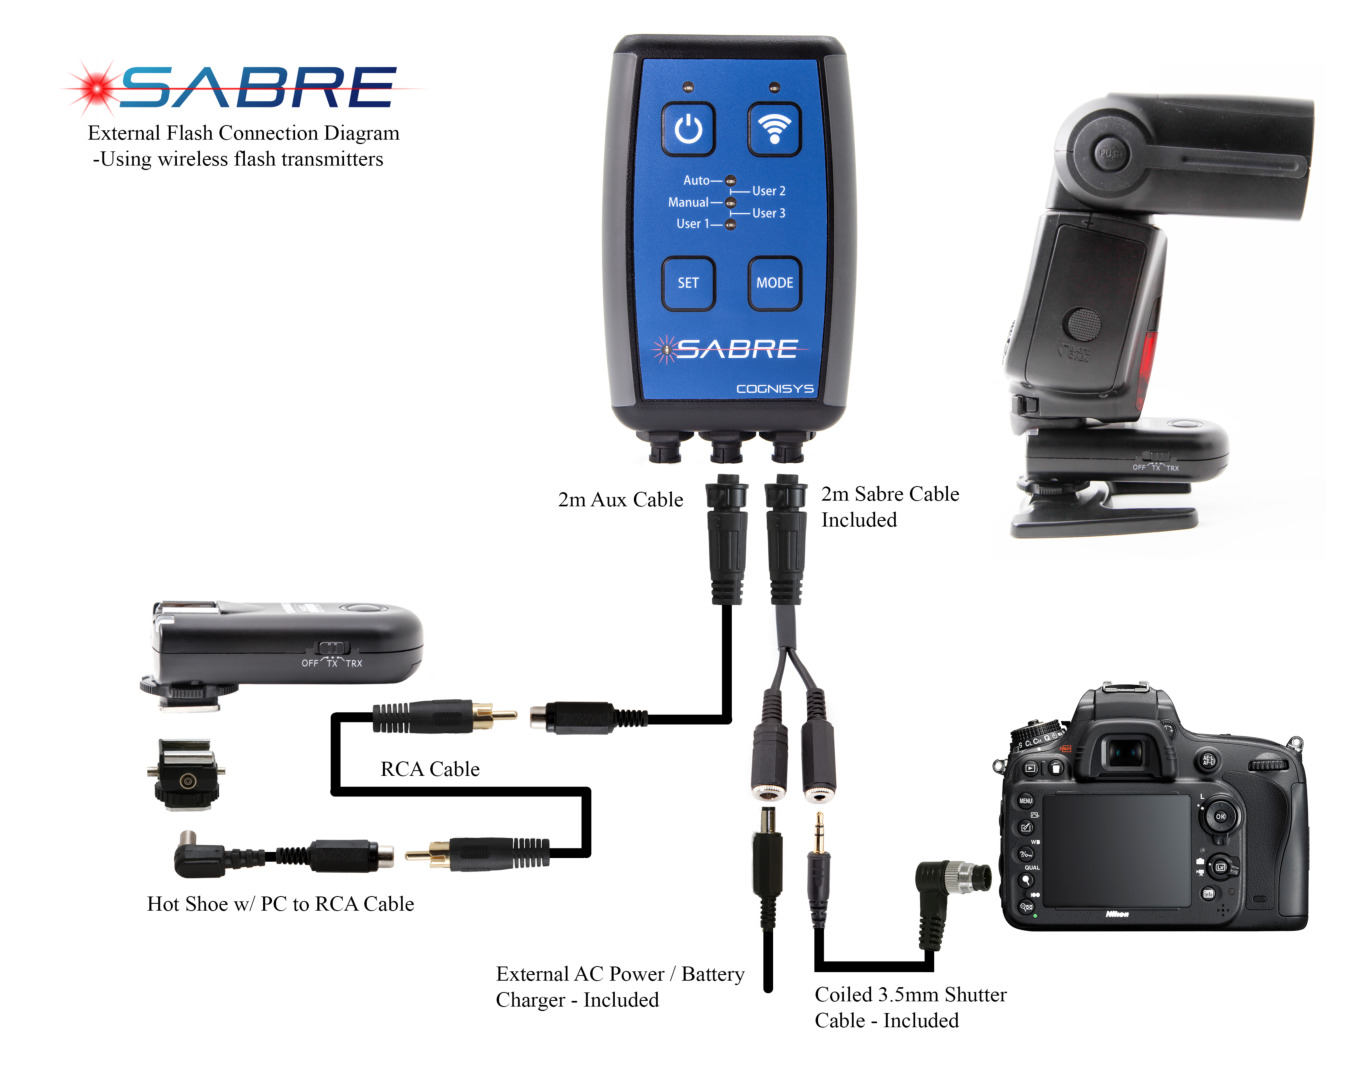
Often having wires between the flash(es) and Sabre is not very convenient - in this case you can connect Sabre to a set of wireless transmitters as shown below to eliminate this connection. The flash transmitters shown below are Yongnuo RF-603C II but any flash transmitter will do the trick. You will need a RCA patch cable and hot shoe assembly in addition to the Sabre Aux cable to make the connection.
Connecting Multiple Wired Flashes to Sabre
Related Products in the Store


