Using the Cognisys Insect Rig to Capture Images of Insects in Flight

Insect Capture Overview
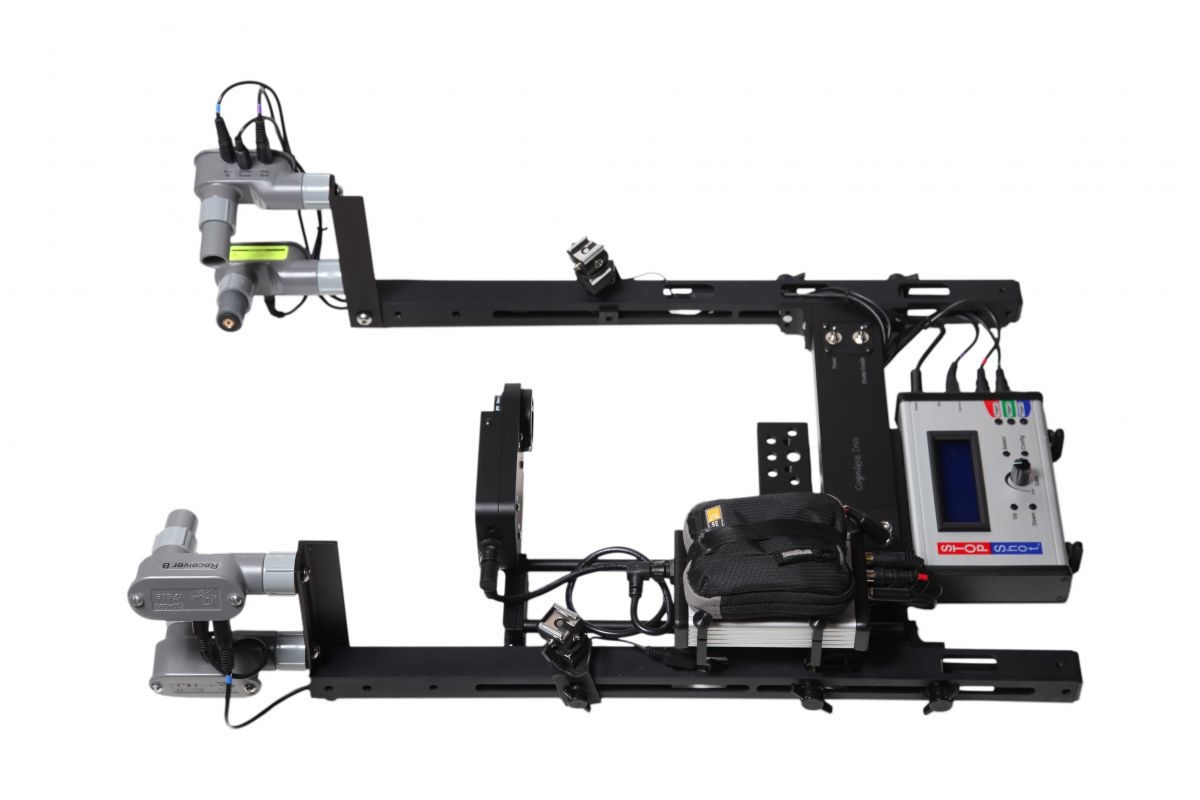
Capturing insects in flight has always been a serious challenge! The Cognisys Insect Rig makes this much easier by providing a platform to overcome all of the technical challenges involved. There are a lot of events that need to be coordinated to make this possible. The Insect Rig works by capturing insects as they trip the laser cross beam sensor out in front of the rig. StopShot, our high speed camera controller coordinates the entire process including control of the sensors, camera, and High Speed Shutter.
The camera is in bulb mode and pre-focused on the intersection of the laser beams. StopShot holds the camera shutter open and the high speed shutter closed until and insect crosses the beam. This kicks off the capture process. StopShot first turns of the laser sensors so the red dots from the laser don't show up in your photographs. It then opens the high speed shutter, this in turn fires the flashes exposing the image. StopShot then closes the high speed shutter and refreshes the frame to get everything ready for the next shot. The whole process takes just over a half of a second. The system has a response time of about 6mS (6/1000 sec). This is the amount of time it takes between the insect crossing the beam and the image being exposed by the flashes. This is compared to an average response time of a DSLR of about 50mS (and that is being very generous).
Two Methods
1. Go To the Insects
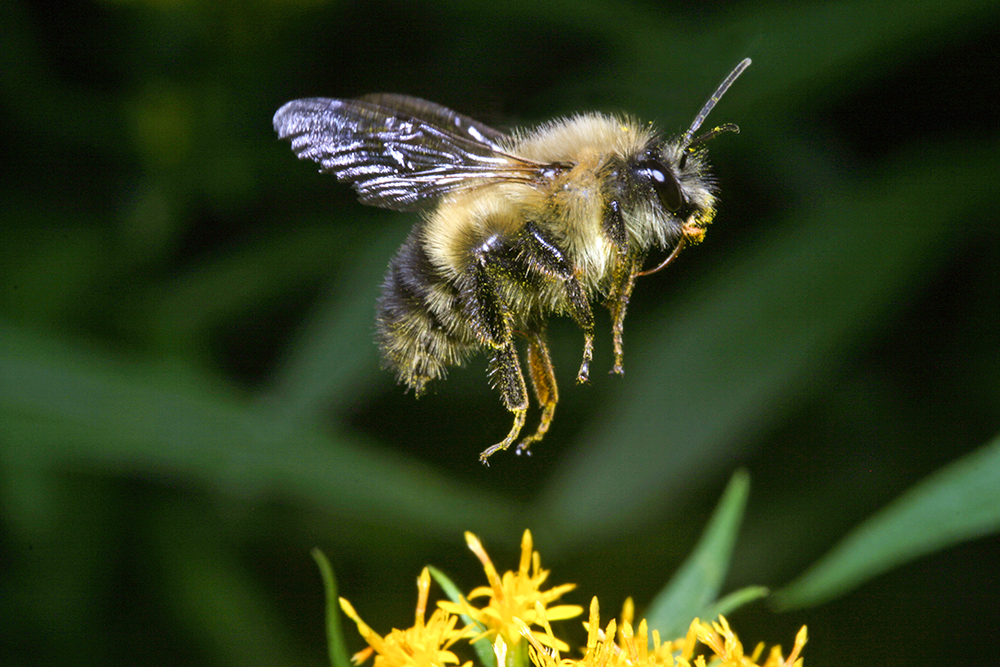
There are a couple of methods to capturing insects in flight. The first is to bring the insect rig to the insects, this works well for bees or other hovering insects that have relatively predictable paths. This method is a lot of fun but takes some practice. To capture insects this way you will want to get the Insect Rig Strap Kit. This kit puts the weight of the kit on your pelvis and neck leaving your hands available to steer the rig to the insects and enable and disable the system. The image to the left was captured with this method.
This method also works very well to capture insects that are resting. You can walk up to them and drop the laser sensors right over them. The system will capture the image when the laser beam is broken by the subject. I have had a much higher hit rate of in focus images doing this over using the traditional AF of the camera. Due to the high speed methods employed using the insect rig and the high speed shutter makes capturing photos this way less susceptible to wind and other subject movement.
2. Bring the Insects to You
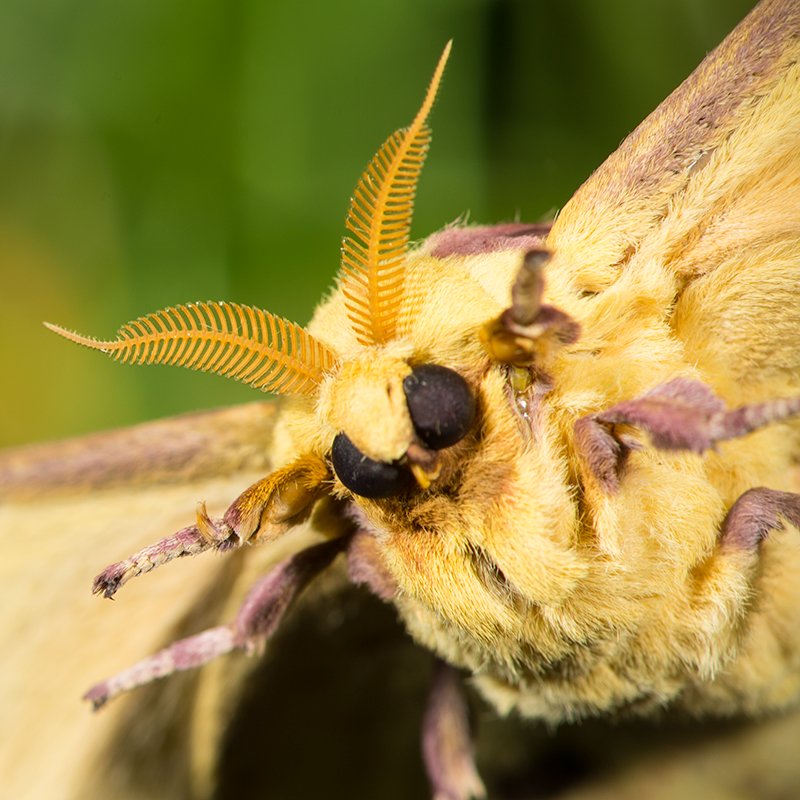
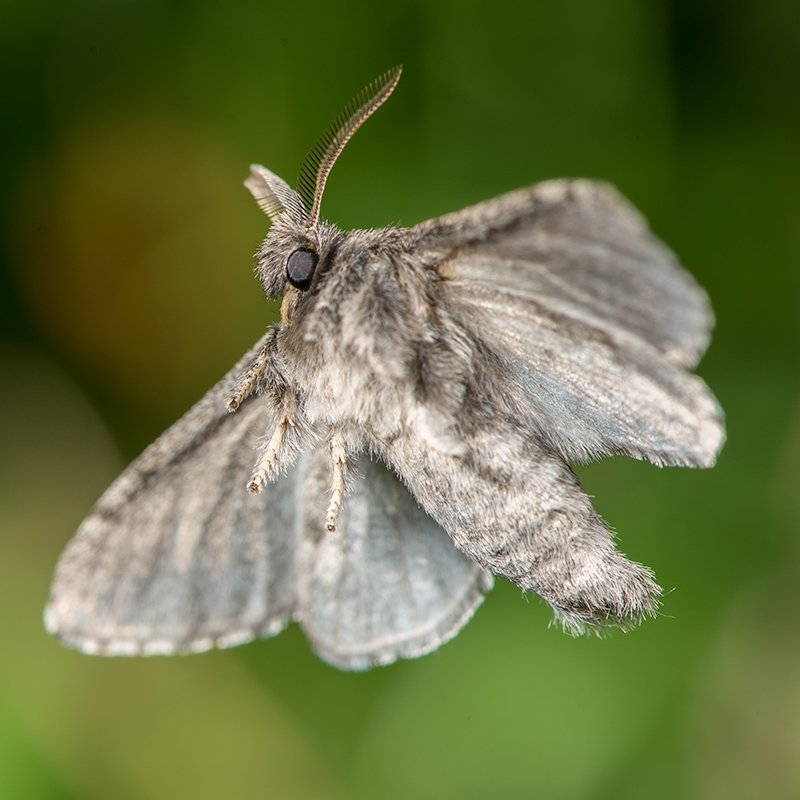
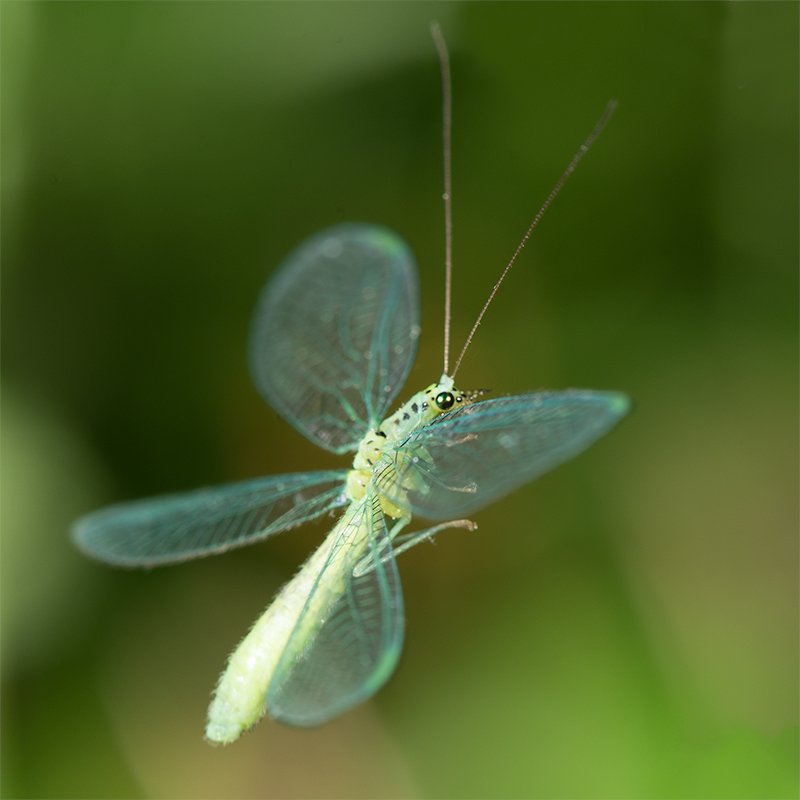
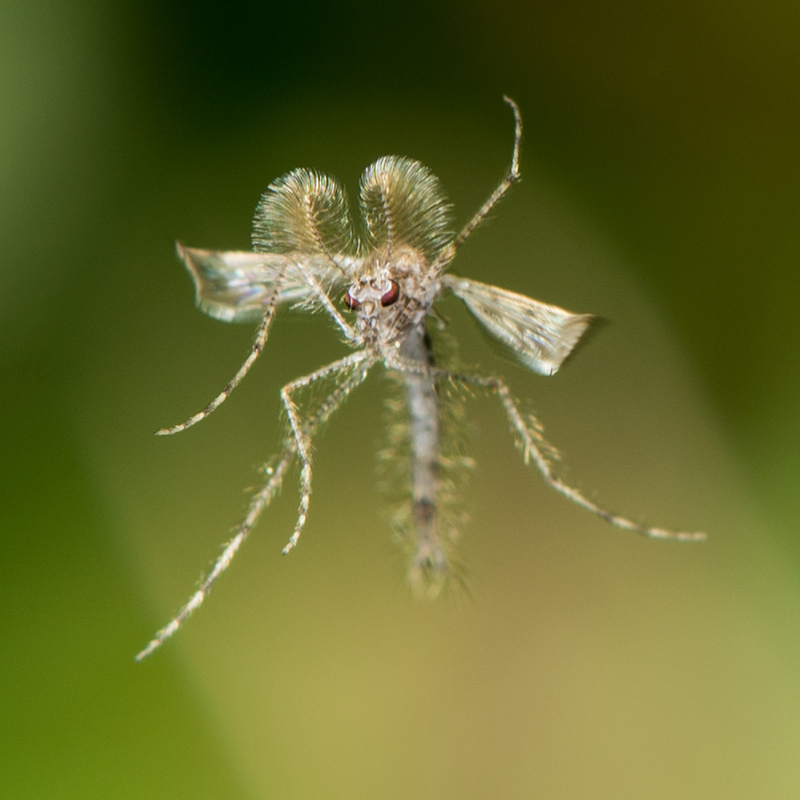
If chasing the insects around isn't for you, another very effective method is to bring the insects to you. The most effective way of doing this is with lights. Lights attract an amazing diversity of insects, I've captured all sorts of different species this way, including Moths, Bumble Bees, House Flies, Beetles and even a Yellow Jacket and horse fly. You will be amazed at the number of different insects you can attract. Different seasons also brings different insects.
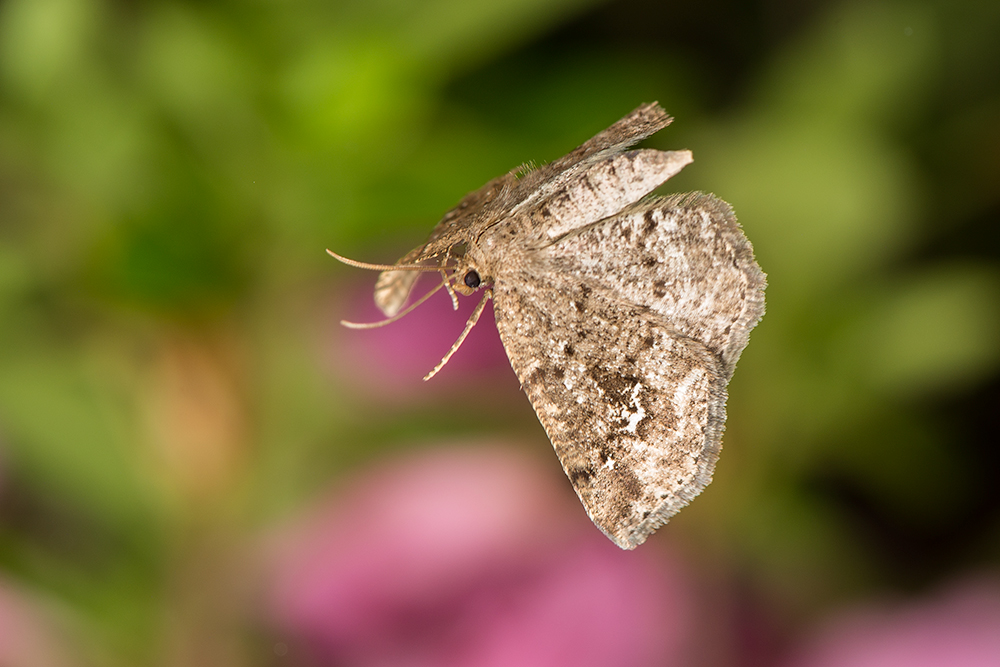
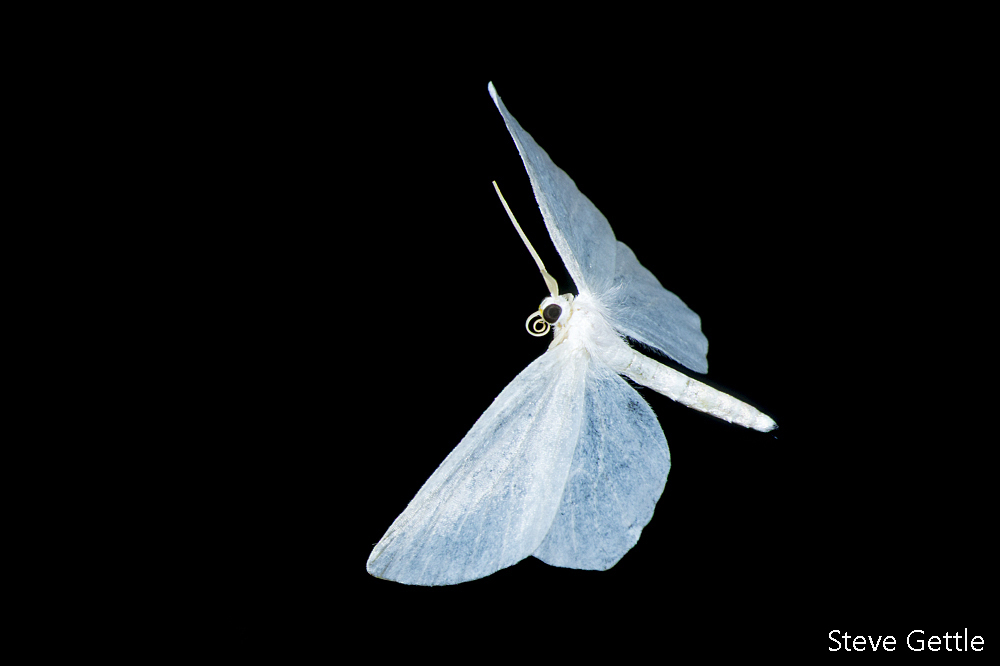
This is the method I use most often as it offers a couple of advantages, the first of course is the huge number of different species attracted by light. The second advantage is that you can control the background and lighting much more precisely (or not at all for an insect on black). Below is a walk through to give you a good starting point for a setup capable of capturing insects in flight. All of the insects at the top and bottom of this page were captured with this method.
Camera and Flash Settings
Since the photograph will be exposed by the high speed shutter and more importantly by the short duration of the light from the flashes you will need to make certain your camera is in bulb mode and StopShot is holding the camera shutter open. You can find all of the StopShot settings here. Put the camera in manual focus and adjust the focus to be on the intersection of the cross beam laser sensors on the rig. Below you can find an equipment list for the image taken above as well as the camera settings.
Settings
- Shooting Mode: M - Shutter Speed - Bulb
- Aperture: f/13
- ISO - 50
- WB - Flash
- Focus - Manual
- Focal Length - 0.4m (15.75in)
- Flash Mode - All Flashes in Manual
- Flash Power (left, right, background) - (1/32, 1/64, 1/16)
Camera Equipment
- Camera - Nikon D600 FX Sensor
- Lens - 105mm Macro f/2.8
- Flash Left - Canon 480EX
- Flash Right - Canon 580EX
- Flash Background - Canon 580EX
When attracting insects at night there is very little ambient light to create ghosting problems. The only ambient light you need to worry about is the light used to attract the insects. For this setup there is a 160W bulb but I have also used a 40W black light with good success. Unless you go crazy with the power of your light used for attraction the settings above will work fine. If however you plan to chase insects around in bright day light or sunshine you will need to stop the camera down considerably more. This also means you will have to increase the flash power to compensate. If you use the settings above in bright sunlight you will see ghosting in your images.
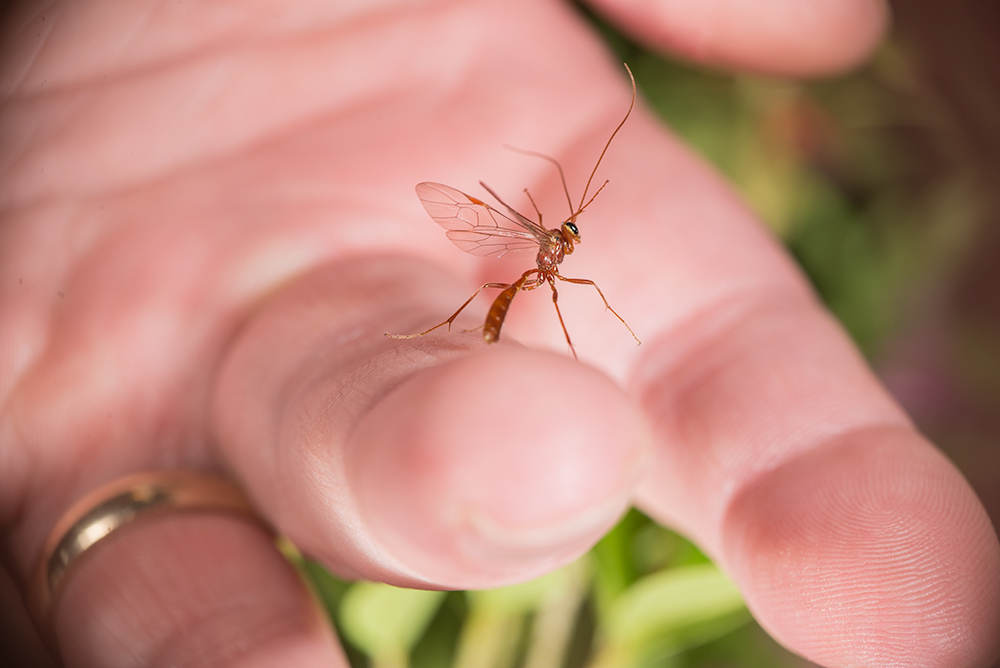
The image of an Ichneumon Wasp to the left is an un-cropped shot from the full frame D600 to give you an example of the field of view you will get with a 105 mm lens and a focal length of 0.4m. The wasp itself is about 10 mm long (not including the antennae). Also notice the slight vignetting in the corners of the image. This is due to the high speed shutter. You can find more information about vignetting and the high speed shutter here. The vignetting could be further minimized by shortening the focal length some.
The magnification for this photograph is a bit higher than 0.25, this lens is capable of magnifications as high as 1:1. With a suitable lens we have used the insect rig at magnifications of 2X or even a bit greater. Just keep in mind the higher the magnification the lower the number of in focus correctly framed insects you will have at the end of the day. Just like so many things in photography it is a trade off.
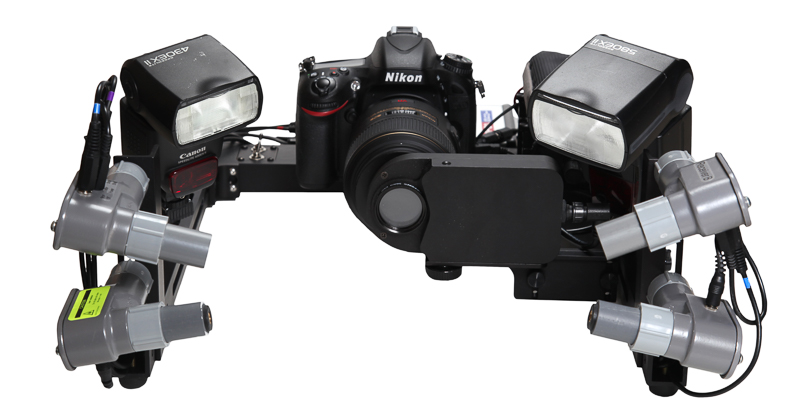
The Big Picture
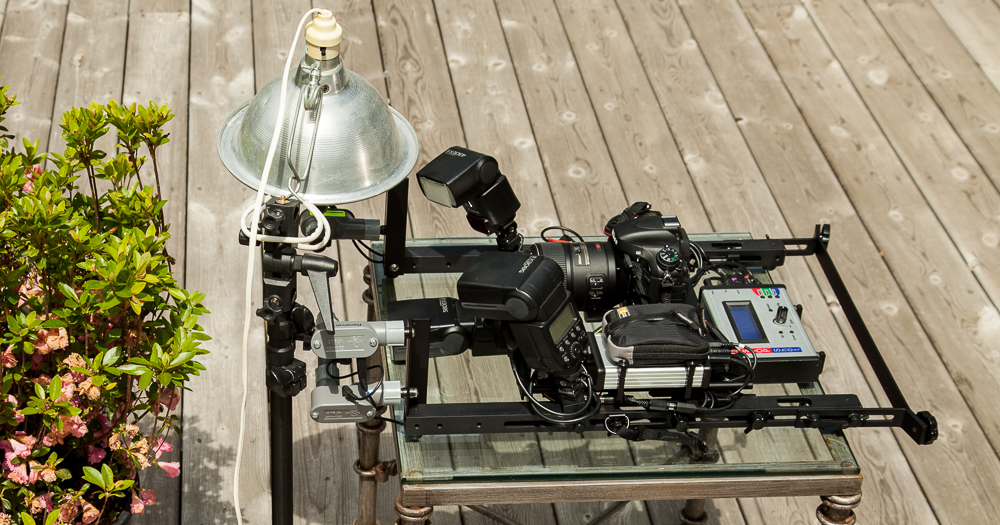
Pictured above is the setup used for capturing insects drawn to the light. The plant in the image was used as the background for the photograph. You can see a 580EX flash laying on the glass table, this flash is used to illuminate the background. The flash is wired into the insect rig using a RCA Y-cable and a PC to RCA adapter. Adding more flashes is easily done with the rig.
The Results
 Out of Stock