Create a Virtual Object with the StackShot 3X
StackShot 3X - Using the Virtual Object Kit
On this page we walk through how the virtual object of this green beetle was created. We will cover all the way from capturing the photographs for the each stack, image processing, putting together the object, and finally hosting the object. This page is meant to be an overview of the process so it won't cover every detail but it will give you enough information to be able to create a virtual object of your own.
This particular subject was chosen because it is very shiny. This makes photographing it quite difficult, but it also shows off the advantages to this technique. This subject was not only captured all of the way around but also from two camera elevations. Roll over the setup image to see the second camera orientation. You can also click the image above to stop it from rotating, then click and drag the mouse down, the view will change so you are looking at the subject from the top. Then you can start or stop the animation or drag around the insect manually.
Thanks to Tony Gutierrez for providing the subject
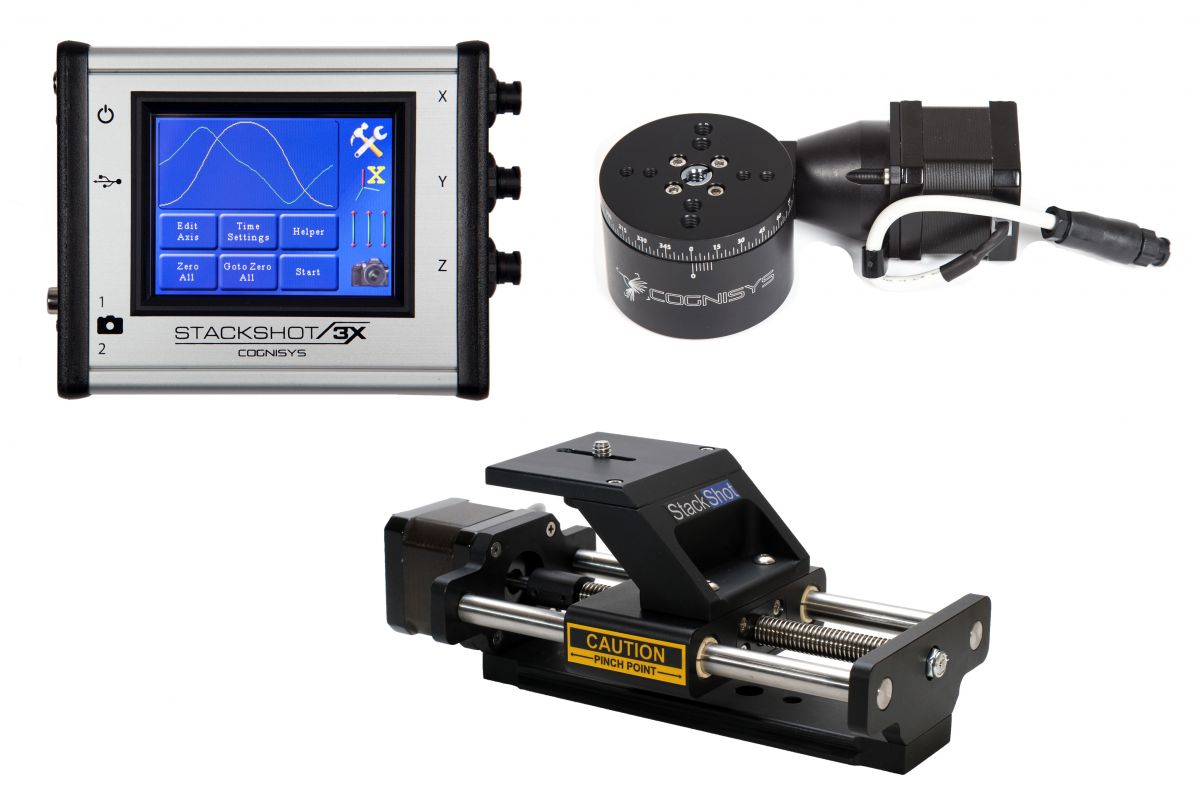
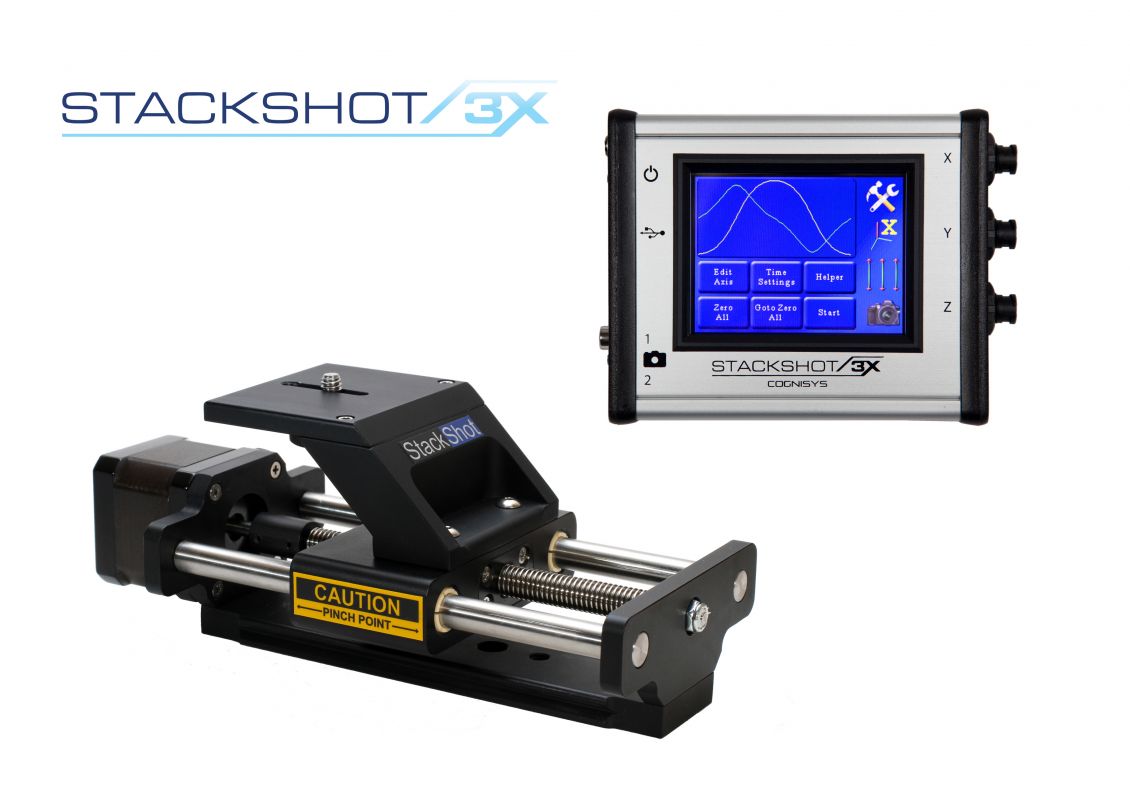
Equipment Used
StackShot 3X Virtual Object KitNikon MC-DC2 Shutter Interface Cable
Arca Adapter Plate - Optional
Controller Carrier Kit - Optional
5200mAHr Li-Ion Battery Kit - Optional
Camera - Nikon D600
Mode: Manual
Aperture: f/8
Shutter Speed: 1/160s
ISO: 200
Flashes: 2 x Canon 580EXII both
Mode: M at 1/32 power in white box
Wireless Triggers: (from camera to flash)
Yongnuo RF-603CII - Optional
StackShot 3X Virtual Object Kit Settings
Mode: Stacking / Stack - XR (Stack Rotate)
Rotation: 10° - 35 steps
Stacking: 1mm / step
Step 1 - Connections and Physical Placement
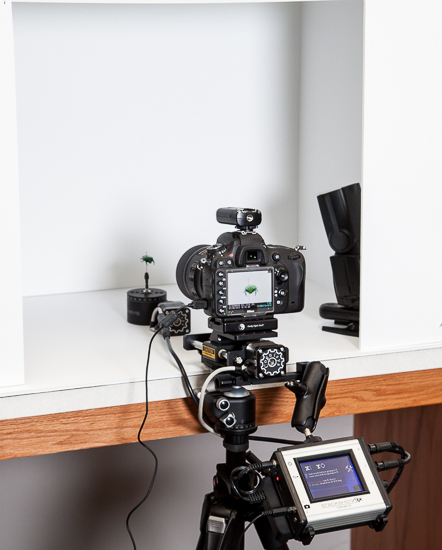
To create a stacked virtual object we will need the subject to rotate and the camera (or subject) to move forward and back in relation to the subject. One possibility is shown above. Just tailor your setup to your subject and equipment. Once everything is placed we will need to connect the StackShot Rail to the X axis (top axis), and the rotary table to the Y axis (2nd from the top). The camera should be connected to the shutter output using a shutter interface cable (purchase separately). The only connection remaining is from the flash to the camera. In this setup I used wireless flash triggers but any reliable method will work fine. In this situation the StackShot will fire the camera via the shutter interface cable and the camera will fire the flashes.
Step 2 - Set the Exposure and Lighting
First we need to set our camera and flashes to get the correct exposure. For this insect the exposure is tough due to the very shiny exoskeleton. Because this guy was so shiny I decided to use a white box and two flashes to light it. One of the flashes can be seen in the setup image, the other mirrors it on the other side of the subject. The most important part of setting the exposure is ensuring everything is in manual mode. Manual focus, manual shutter speed, manual aperture, fixed white balance and manual power on the flashes. Auto exposure can vary significantly from shot to shot giving the Focus Stacking software fits. The closer we can keep all of the exposures the better off we will be in post processing. All of the settings used for the camera and flash are listed above.
Step 3 - Configure StackShot - Mode: Stack XR (Stack, Rotate)
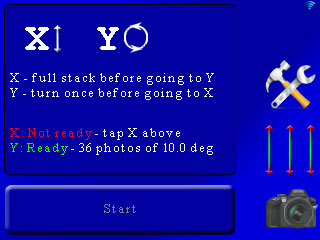
StackShot 3X has a built in mode for creating virtual objects. When you first get your StackShot 3X it will come up in single axis stacking mode. We need to change this to Stack Rotate mode. To change this select the settings icon (tools), the first in the list of options is Mode:Stacking. Select this button. StackShot will bring up all of the Stacking modes. The mode we want for this is the second one down - Stack XR (Stack, Rotate). Select this and you will see the screen to the left.
As you can see the X needs to be configured (it's red) and Y is ready (it's green). The default settings for Y are 35 steps at 10 degrees each. This will give us 36 images and 360 degrees around the subject. If your StackShot shows something different select the big Y at the top and it will allow you to change the step size (degrees) and the number of steps. For X we need to set the start and stop points for the stack. In this step you need to make certain you go far enough in both directions to keep the subject in focus regardless of the rotational position. To set these positions select the big X and it will take you to a screen where you can set your step size and the beginning and end points for your stack. If you need to rotate the subject to ensure your start or end points are good select the 3 Axis Multi-colored icon (Move Axes Icon) on the right. This will allow you to rotate the subject as well as move the camera in the stack axis. After you are finished moving things around press the Red Return Icon to get back to the X setup screen. In addition to setting the start and end points for your stack this is the screen where you enter the distance for each step. The default here is 1.000 mm. If your lens / aperture combination requires a different number press the X distance and use the number pad to enter your desired step size. This number should be about 75% of your actual depth of field. You will want some overlap of in-focus area on adjacent images.
Once you have the stacking (X) axis all taken care of go back to the home screen by - pressing the OK button. You should see both X and Y axis are ready. StackShot 3X will also tell you how many steps you have for each axis with your given step size and chosen beginning and end points. If you want to change anything before you hit the Start button you can do so by pressing X or Y above.
Step 4 - Capture the Images for the First Row
This step is easy - press the start button. Ok... not so fast, make certain your batteries are fresh for your flashes and camera. I had one of the flashes start firing every other step when I was shooting this stack, I had to stop and restart it with fresh batteries. You will also want to make certain you have enough space on you memory card.
Step 5 - Capture the Images for the Second Row
To capture the second row of images the camera was raised and the start and stop points for the stack were adjusted. You can get a feel for the amount the camera was raised by rolling over the setup image above. In this case there were fewer images in the X stack from this view. Having less images made resetting the start and points worth the effort. Taking another set of images was very worthwhile for this subject just because the shiny surface doesn't allow you to see all of the details from one angle.
Step 6 - Sort and Stack the Images You Captured
Next we need to sort out and stack all of the images we just captured. Both Helicon and Zerene have batch processing capabilities. Helicon can even separate the files for you so no sorting is necessary. Helicon calls this feature Split and Enqueue Stacks. You can find more details in the Advanced Functionality section of the Helicon Manual.
For this Stack I used Zerene Stacker. In order to use Zerene's batch processing we need to put each stack into its own directory. To sort the images I used a file sorting app you can find here (Java required). Tell the app where the source images are how many images in each stack and where you want it to put the sorted images and it will create a directory for each of the stacks and place all of the files in the directories. Next use the batch tool in Zerene to Stack each of the images in each of the folders. For more information on using the Batch Processing feature in Zerene you can check out the Zerene Stacker Manual.
Step 7 - Post Processing
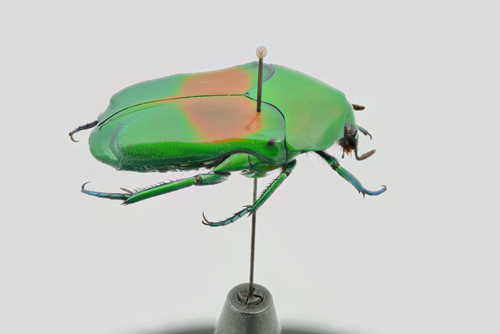
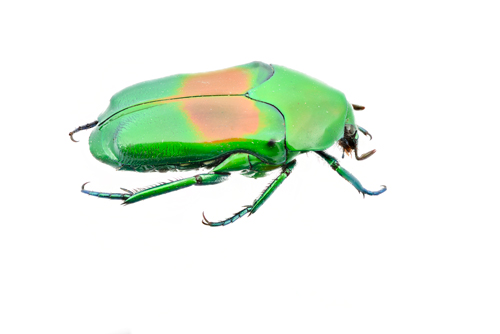
After you have all of your stacks you will likely want to do a little post processing before using the images to create the virtual object. I generally use Lightroom and Photoshop for this. You can see below an example of pre and post processed images. For this example I removed the insect mounting pin using Photoshop. This was by far the most time consuming part of the process - especially when it needed to be done to each of the 72 images used for this object. Certainly not necessary but I think it is worth the effort.
Step 8 - Create the Object
Depending on what you want to do with the object there are a lot of different options for creating it. For the object on this page I used a free jQuerey Plug in called SpriteSpin. You can find more details about this program on the SpriteSpin website. Putting the object together with SpriteSpin takes a bit of web development skill so if you are looking for something that takes less technical aptitude you can give Object2VR a try. This program will create HTML5, Flash, or Quicktime VR outputs. It will also handle multiple rows of input images. They have a free trial that is fully functional but adds a company watermark. The basic license is about 69 Euros ($80). It is also possible to play back all of the images as a movie - your final output being a mp4 or wmv file. In this case you will want to use video editing software to give each frame more time than just playing them back at 30 frames per second. You can see an example of this below. In the video below each stacked image is shown for 0.1 seconds. At 30 fps that comes to about 3 frames for each image.
Just to give you a feel for file size. This object is made up of 72 total images (36 in each row). Each image is 800 x 534 pixels. Each image is about 150kB, all 72 images are about 10.8MB. By comparison the video below at 1080P is 30.3MB. The original images were 6016 x 4016 pixels (24.3MP). You can use any size you need for your object, the 800 pixels across works well for our website but certainly more resolution is available if you want it.
As low as $1,399.00
As low as $879.00