Ballistics Photography with StopShot
Ballistics Photography
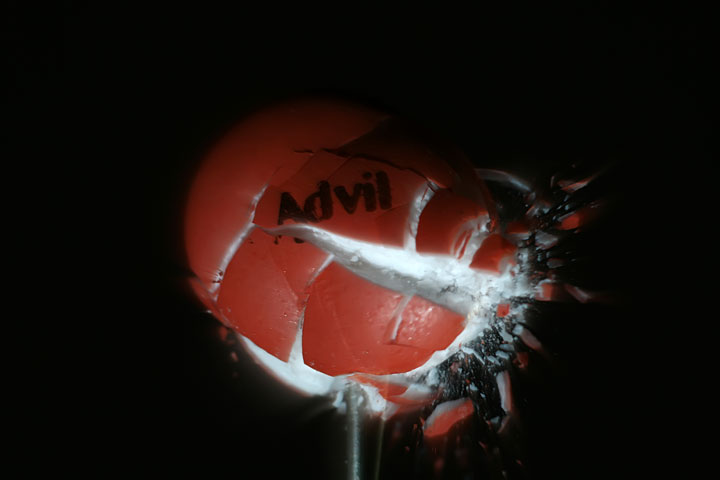
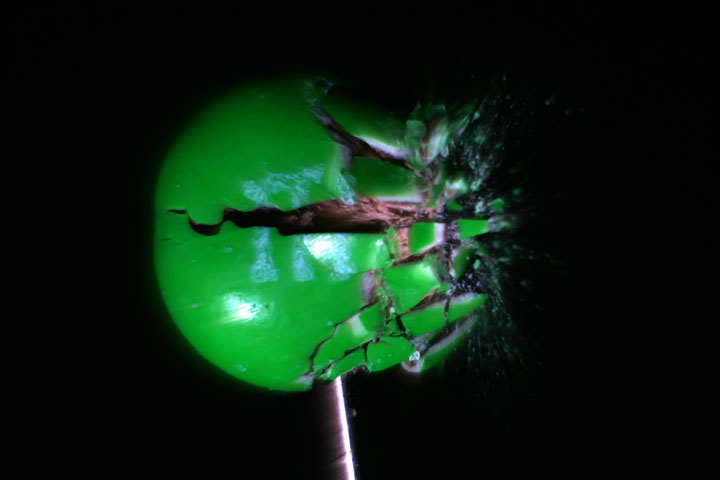
StopShot has a mode dedicated to ballistics. When using ballistics mode the cross beam sensor is required. Our cross beam sensors allow you to get incredible placement accuracy of the projectile you are trying to capture. StopShot makes ballistics easier than ever. To use StopShot's ballistics mode all you need to do is place the sensors a known distance apart and set the distance multiplier in StopShot. For example: If the sensors are 6 inches apart and the distance multiplier configured to one, you would set your camera to take a photo at 6 inches from the last sensor. That is where the projectile will be. No more guessing the velocity and trying to calculate the distance from the sensor where the projectile will be. This method takes all of the frustration out of ballistics photos. The trickiest part of ballistics then becomes lining up the sensors and getting the flash fast enough to stop the action. As you can see from our demo pictures we were able to consistently capture a pellet buried inside something as small as an M&M (plain, not the larger peanut variety).
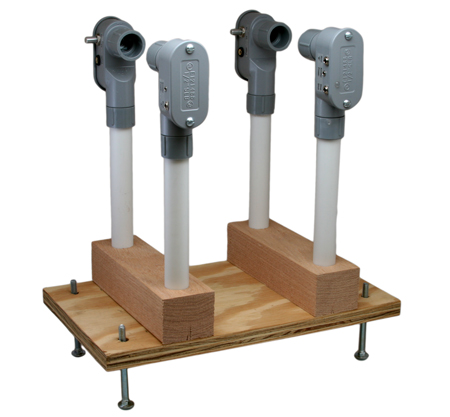
The fixture shown to the left was designed to make aligning the sensors with the projectile easier. The sensors are exactly six inches apart. Each of the four corners has an adjustable foot on it for fine adjustments up and down. This fixture is very simple to make and it saves a lot of time. No more trying to find just the right shim to get the sensors to line up with the projectile.
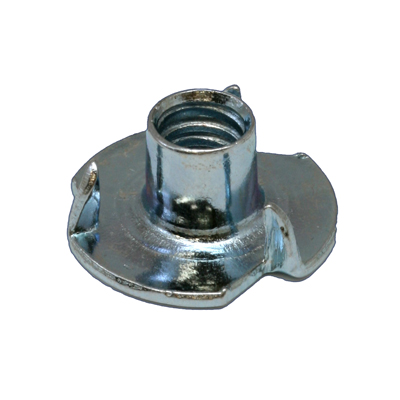
We used a 1/4" Tee nuts like this to make the feet adjustable. The feet are just 1/4" x 3" carriage bolts.
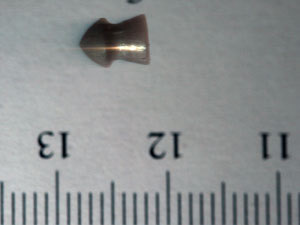
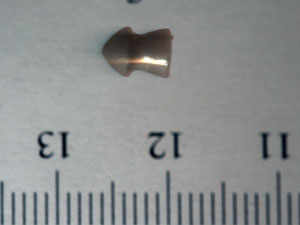
The pictures below are two consecutive photos of a pellet moving at about 300 ft/s taken with a 100 mm macro lens and a prototype flash we are working on. The scale is in centimeters (small tick marks are mm). With the ballistics mode in StopShot it is very easy to precisely place the projectile where you want it for your photo. If you have ever played with ballistics photos and air guns you know how much the speed of the pellet can vary from shot to shot. With ballistics mode this variation is compensated for by StopShot.
Why do I need to fire the flash instead of the camera when doing ballistics photography?
The short answer is shutter lag. Shutter lag is the time between when the camera is triggered and when the camera actually takes the image. This lag can be 250mS or longer with some cameras. Even the latest DSLR cameras have shutter lags around 50mS or 50/1000 s. To put this in perspective, an air pellet moving at 900ft/s will move 45 ft in the 50mS it takes for your camera to respond to the trigger it gets. This puts your camera 45ft down range from where the pellet is fired - pretty inconvenient to say the least. On the other hand a flash fires just about instantaneously. So we can get around the slow response time of the camera by leaving the shutter open in a darkened room and firing the flash when projectile is detected by StopShot. This method gives us the response time needed to get consistent shots of projectiles. One last note about shutter lag especially for Canon shooters and that is the lag is not consistent, the amount of lag can depend on the time since the last shot or since the last half press. This makes for not only too much lag but too much variability.
StopShot Studio - Ballistics
Ballistics photography can be tricky. In this video we use StopShot Studio and walk through the basic setup including settings, adjustments, and ways to diagnose your flash not triggering.
The Results