Capturing Lightning with StopShot
Capturing Lightning with StopShot
Capturing lightning is always hit or miss without a triggering system. Put the camera in bulb mode, hold down the shutter and hope for a strike. While there have been some excellent results from this method there has to be a more reliable way to go. Enter StopShot. There are a couple of advantages of using an automated system to capture lightning. The first is that the strikes are much more likely to be captured. The response time of the system is fast and consistent. The second advantage is that you can set the exposure time to much shorter values. This will result in photos with much lower noise levels. Keep reading for several tips and tricks that can help you increase your chances of success while capturing lightning.
The Setup:
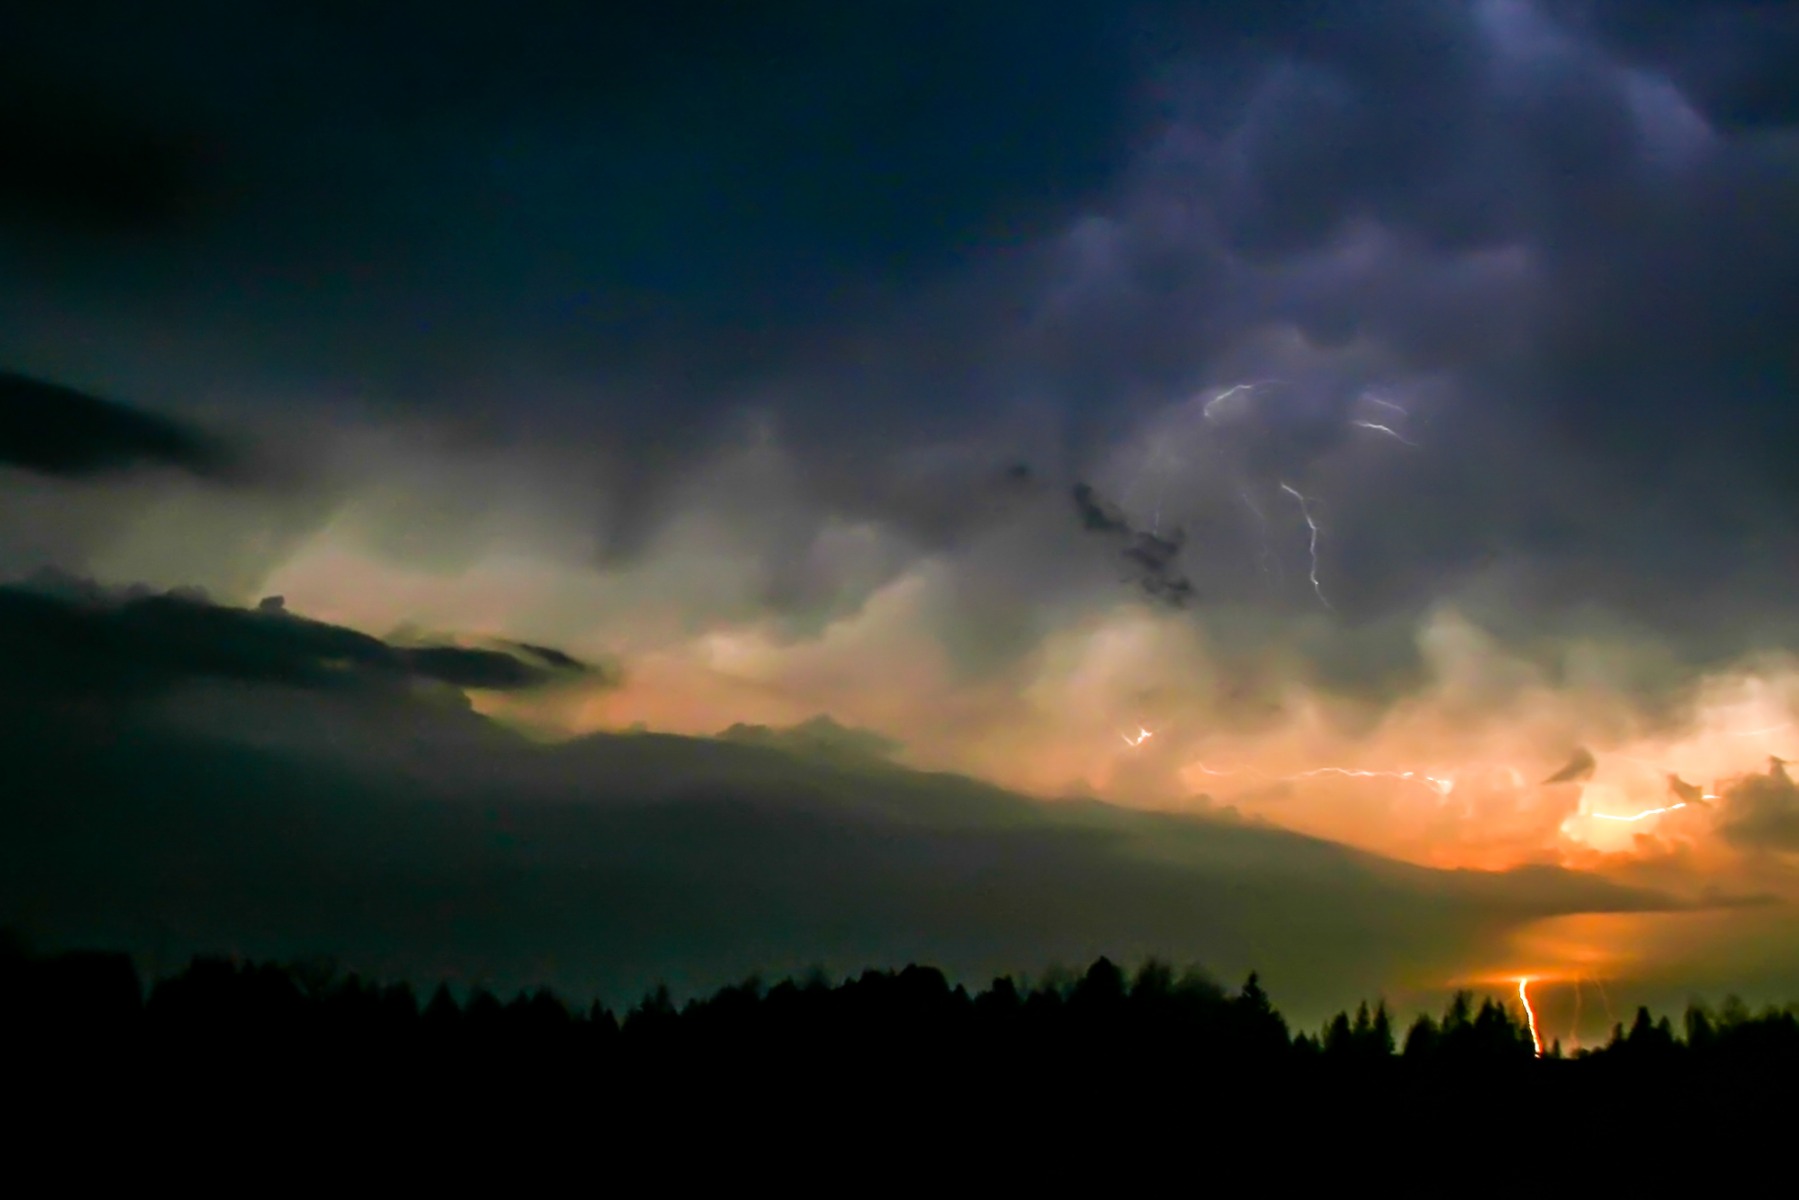
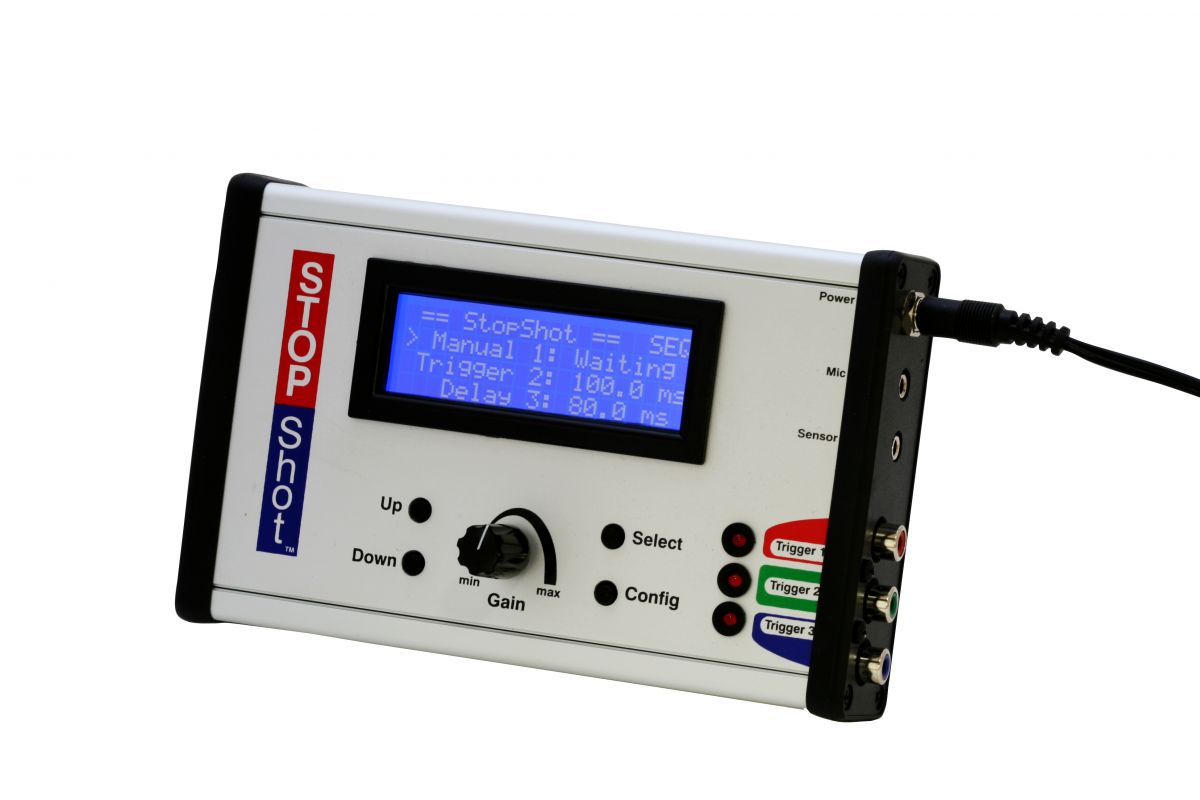
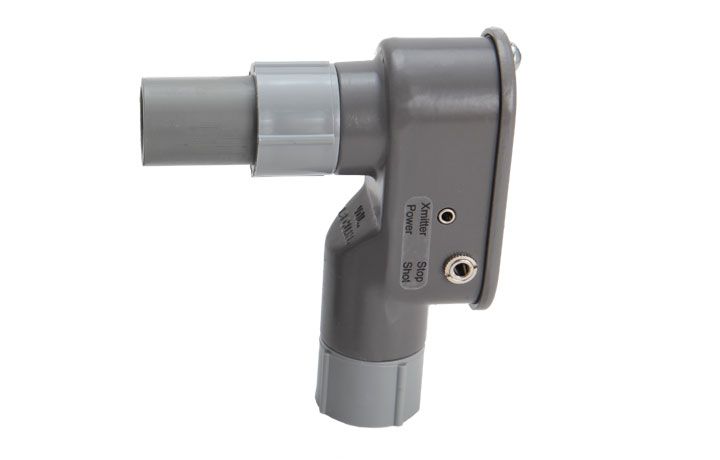
This picture was captured using StopShot connected to the receiver half of the IR beam sensor that comes with the StopShot Kit. The receiver was removed from the beam sensor and placed on a tripod pointed toward the storm. The terminal adapter (plastic light shield) was also removed from the front of the sensor to increase the viewing angle of the photo sensor. Trigger 1 was connected to the remote shutter of the camera. After everything was set up the tough part of sitting back and watching the storm roll in began as StopShot and the camera did all of the work. The sitting part didn't last too long though, it started pouring shortly after this shot was taken. Time to pack up and head for the house (neither the camera nor StopShot likes the water).
The Timing:
Only one timing setting on StopShot needs to be adjusted, The delay for Trigger 1 needs to be adjusted to the minimum value of 50uS. The rest of the timing is determined by the camera (the shutter lag). This particular photo was captured by a Canon Digital Rebel XTi (400D), a camera not known for its blazing fast shutter response time. The shutter lag for this camera is around 140 ms and varies a bit from shot to shot. This means that after StopShot detected the light pulse from the lightning it tells the camera to take the picture, the camera thinks about it for 140 ms and then opens the shutter. I had the shutter time on the camera set to a two second exposure. A typical lightning strike often lasts several hundred milliseconds so even with the long shutter delay it is possible to get some great captures of lightning. Some strikes can last as long as one second. I live in an area that doesn't get too many thunderstorms and was able to capture the above picture during the first storm of the season.
Other Details:
Using StopShot and the photo sensor as a lightning detector has its limitations. It works by sensing the abrupt change in light level created by the lightning. The hardware in StopShot filters out the signal from the photo sensor created by ambient light but the lightning strike still needs to create a bright enough flash for detection. The sensitivity can be adjusted by the gain knob on StopShot. The picture above was taken during the night when it was dark out. I have not tried it but my guess is that it will not be sensitive enough to capture lightning during the day.
Improving Shutter Lag with StopShot (for Canon Users Only):
For those of you that shoot with Canon cameras the shutter lag can be significantly reduced by leaving the mirror locked up before the camera is triggered. Sorry Nikon owners but the your shutter lag will not be shortened by this method. For the Canon Rebel used above the shutter time goes from 140 ms and variable without the mirror locked up to 68ms and stable when it is locked up, this is true of most of the Canon DSLR's. You can use StopShot to keep the mirror locked up until the desired event comes along and triggers the system. The camera will only allow the mirror to stay locked up for 30 seconds before it resets, but you can set up StopShot to refresh the mirror and look for a sensor input (lightning flash). Here is the setup:
1. Put your camera into mirror lockup mode.
2. Tie Trigger 1 and Trigger 2 together with an RCA Y cable (2 male to 1 female).
3. Connect the female RCA jack to your camera via the shutter cable for your camera.
3. Set the Global timing mode to sequential and the sequential mode timeout to 31 seconds.
4. Set Trigger 1 to Delay of 500mS..
5. Set Trigger 2 to Trigger and a 50uS delay.
6. Make sure Trigger 3 is off.
This sequence will keep the mirror locked up. Without this sequence the camera will reset every 30 seconds. This you a little bit of feel for the flexibility that is programmed into StopShot.
Starting at $49.00